


What is Oil-Free Fermentation?
At its core, this preservation method is known as lacto-fermentation. The 'oil-free' aspect isn't a modern modification but a fundamental feature of the process. It works by using salt and water to create an environment where beneficial, naturally occurring
bacteria called Lactobacillus can thrive. These microorganisms are already present on the surface of fresh vegetables. When submerged in a saltwater brine without oxygen, these friendly bacteria begin to convert the natural sugars in the vegetables into lactic acid. This acid is a natural preservative that lowers the pH of the food, preventing the growth of harmful spoilage bacteria. Unlike pickling, which relies on adding an acid like vinegar, fermentation creates its own protective, acidic environment, all without a single drop of oil.
The Power of Friendly Bacteria
The 'friendly bacteria' in the headline are probiotics, and they are one of the biggest benefits of eating fermented foods. This process doesn't just preserve your vegetables; it transforms them into a functional food that can support your health. These live microorganisms are celebrated for their role in promoting good gut health. A healthy gut microbiome is linked to improved digestion, a stronger immune system, and overall wellness. The lactic acid created during fermentation also helps create an environment in the digestive tract where these healthy bacteria can flourish. Incredibly, fermentation can also unlock and increase the availability of certain nutrients in vegetables, making them even more beneficial than when they were raw.
Getting Started: What You'll Need
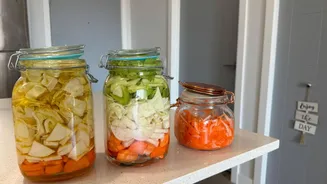
The beauty of fermentation lies in its simplicity. You don't need a lab full of expensive equipment. The basic tools are likely already in your kitchen. First, you'll need glass jars with lids. Mason jars are a popular choice. Second, you need a way to keep the vegetables submerged under the brine, as exposure to air can cause problems. This can be a special fermentation weight, a smaller jar filled with water, or even a clean stone. Third, you need salt, but not just any salt. Use an unrefined salt like sea salt or kosher salt that is free of iodine and anti-caking agents, as these can interfere with the fermentation process. Finally, you'll need filtered or spring water, as the chlorine in some tap water can inhibit the good bacteria.
A Simple Guide to Your First Ferment
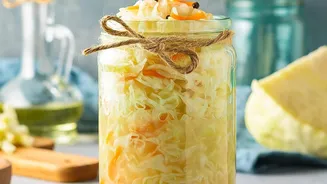
Ready to try? Start with clean hands, equipment, and fresh, well-washed produce. Chop or shred your vegetables and pack them tightly into your jar. Next, prepare your brine. A general rule of thumb is about 1 to 2 tablespoons of salt per litre of water. Pour the brine over the vegetables, leaving about an inch of headspace at the top. The most crucial step is to ensure all the vegetables are fully submerged beneath the liquid. Use your weight to hold everything down. Loosely seal the jar and place it on a tray to catch any overflow, which is common as the fermentation produces gas. Store it at a cool room temperature, ideally between 68 and 72 degrees Fahrenheit, away from direct sunlight.
Patience Is the Final Ingredient
For the next few days, you will need to 'burp' the jar daily by briefly loosening the lid to release built-up carbon dioxide. You'll soon see bubbles rising, and the brine may turn cloudy – these are signs that your friendly bacteria are hard at work. The fermentation time can range from a few days to a few weeks, depending on the vegetable and ambient temperature. Taste it periodically. When it reaches a tangy flavour that you enjoy, the ferment is ready. Transfer the jar to the refrigerator with a tight lid. The cold temperature will dramatically slow the fermentation process, allowing you to enjoy your preserved vegetables for several weeks or even months.