


The Secret to No-Churn Creaminess
The magic behind no-churn ice cream lies in two key ingredients: heavy cream and sweetened condensed milk. Traditional ice cream requires churning to break down ice crystals and incorporate air, resulting in a smooth texture. In a no-churn recipe, whipping
the heavy cream until it forms stiff peaks introduces air, creating a light, fluffy base. The sweetened condensed milk plays an equally crucial role. Its high sugar content lowers the freezing point of the mixture, which helps prevent the formation of large, crunchy ice crystals and ensures a creamy, scoopable final product right out of the freezer. This clever combination mimics the texture of churned ice cream without the need for an expensive, bulky machine.
Gather Your Five Simple Ingredients
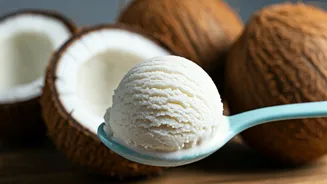
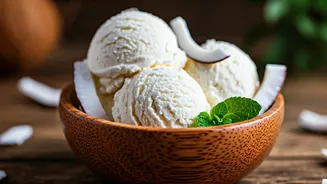
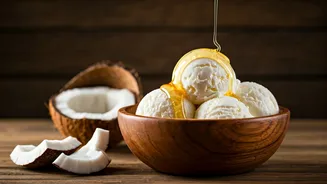
This recipe champions simplicity and fresh flavours, requiring just a handful of ingredients. The star, of course, is fresh tender coconut. For the best results, choose young, green coconuts that feel heavy with water. The flesh, or 'malai', should be soft, sweet, and easy to scoop. Avoid mature coconuts, as their flesh can be tough and fibrous. You will need about one cup of tender coconut pulp and a quarter cup of the coconut's water. The other essential components are one cup of cold heavy whipping cream (at least 36% milk fat is ideal for whipping) and about three-quarters of a cup of sweetened condensed milk. For an extra layer of coconut flavour, some recipes also incorporate coconut milk.
Step-by-Step: Your Path to Perfection
1. Prepare the Coconut Base: Start by scooping the soft pulp (malai) from your tender coconut. Place about a cup of this pulp into a blender along with a quarter cup of the fresh tender coconut water. Blend until you have a slightly chunky or smooth paste, depending on your preference. Set this mixture aside.
2. Whip the Cream: For the best results, chill your mixing bowl and beaters in the refrigerator for about 20 minutes. Pour the cold heavy cream into the bowl and whip it using a hand mixer or stand mixer. Start on a low speed and gradually increase to high. Beat until stiff peaks form — this means the peaks hold their shape when you lift the beaters. Be careful not to over-whip, or you'll start making butter.
3. Combine the Ingredients: Gently pour the sweetened condensed milk into the whipped cream. Using a spatula, fold it in carefully so you don't deflate the airy cream. Next, add your prepared tender coconut paste and continue to fold gently until everything is just combined. For extra texture, you can stir in some small, finely chopped pieces of tender coconut at this stage.
4. Freeze for Flawless Texture: Pour the final mixture into a freezer-safe container, like a loaf pan. To prevent ice crystals from forming on the surface, press a piece of plastic wrap or parchment paper directly onto the ice cream before sealing the container. Freeze for at least 6 to 8 hours, or overnight, until firm.
Tips for the Creamiest Results
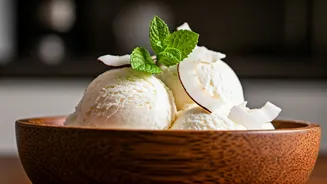
To elevate your homemade ice cream from good to great, keep these tips in mind. Always use fresh, high-quality ingredients; the flavour of the tender coconut is delicate and will shine brightest when fresh. When whipping the cream, make sure it is very cold, as this helps it whip up faster and hold its volume. When you combine the whipped cream with the other ingredients, be gentle. The air you incorporated is key to the final texture, so fold, don't stir vigorously. Finally, patience is a virtue. Letting the ice cream freeze solid overnight will yield the best, most scoopable texture. When you're ready to serve, let the container sit at room temperature for 5 to 10 minutes to soften slightly, making scooping a breeze.