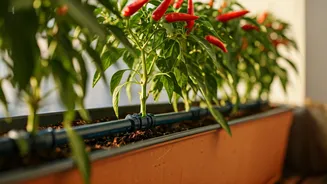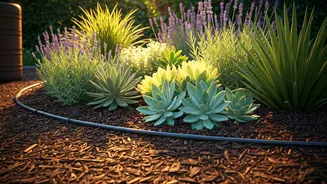


The Smart Upgrade: Drip Irrigation
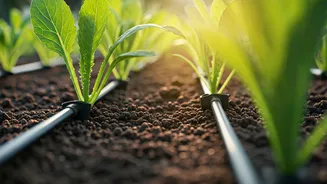
Forget expensive landscaping or rare, finicky plants. The single most impactful upgrade for any Indian garden—whether it's a sprawling lawn, a modest terrace, or a collection of balcony pots—is drip irrigation. At its core, it's a simple system of thin
tubes and emitters that delivers water directly to the base of each plant, drop by drop. Unlike a hose or a sprinkler that sprays water everywhere, this method targets the soil right at the root zone. It might sound technical, but modern systems are incredibly user-friendly, often sold in easy-to-install kits. This isn't just a gadget; it's a fundamental shift in how you care for your plants, making gardening more efficient, sustainable, and rewarding.
Slash Your Water Bill and Effort
The most celebrated benefit of drip irrigation is its incredible water efficiency. Traditional watering methods can be wasteful, with up to 50% of water lost to evaporation, wind, and runoff, especially in our hot climate. Drip systems, by contrast, can reduce water usage by as much as 70%. By delivering water straight to the roots, almost none is wasted. This is not only good for the environment and a responsible choice in water-scarce regions, but it also translates into lower water bills. Furthermore, it saves you an immense amount of time and physical effort. Instead of standing with a hose every morning or evening, you can automate the entire process with a simple timer. This consistency is also better for your plants, which thrive on a regular watering schedule.
Grow Healthier Plants, Not Weeds
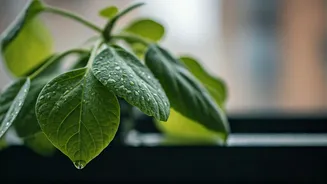
Targeted watering does more than just save water; it creates a healthier environment for your plants. When you water with a hose or sprinkler, you wet the leaves and stems, which can create the perfect humid conditions for fungal diseases like powdery mildew and blight. Drip irrigation keeps foliage dry, significantly reducing the risk of such infections. At the same time, it discourages weed growth. Because you are only watering the small area around your plant's base, the surrounding soil remains dry. Weed seeds in those areas don't get the moisture they need to germinate, meaning you'll spend far less time on the tedious task of weeding. Your plants get all the water and nutrients without competing with unwanted intruders.
How to Get Started
Getting started with drip irrigation is easier than you think. You don’t need to be a plumbing expert. For most home gardens, a DIY starter kit is the perfect entry point. These kits are widely available online and at garden centres across India. They typically include a main supply tube, smaller feeder tubes, various emitters (the 'drippers'), connectors, and a filter. Here’s a basic plan: 1. **Map Your Garden:** Sketch a simple layout of your plants to figure out how much tubing you’ll need. 2. **Choose a Kit:** Select a kit based on the size of your garden or the number of pots. There are specific kits for vegetable patches, flower beds, and container gardens. 3. **Assemble the System:** Connect the main tube to your tap (you might need an adapter, often included). Lay the main tube along your garden beds or rows of pots. 4. **Place the Emitters:** Punch holes in the main tube where you need to water a plant. Insert a feeder tube and place an emitter at the base of each plant. 5. **Add a Timer:** For true automation, connect a simple battery-operated timer to your tap. You can set it to water for a specific duration every day or every few days.