




Why a Low Bun Is Your Morning Hero
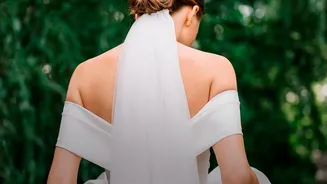
The low bun is the ultimate style chameleon. It’s sophisticated enough for the office, yet relaxed enough for a casual day out. Positioned at the nape of the neck, it projects an air of effortless grace. Unlike high buns that can sometimes feel severe
or overly casual, a low bun is universally flattering for all face shapes. It’s a style that works with your hair, not against it, whether your locks are freshly washed or on their second or third day. That slight grit from unwashed hair can actually provide better hold, making the style even more secure. The goal is a look that is both beautiful and practical, and a low bun held with pins delivers on all fronts, keeping hair neatly off your face while looking chic.
Gathering Your Essential Tools
You don't need a professional salon kit to achieve this look. In fact, you likely have everything you need already. Before you start, gather these simple items: a hairbrush (a boar bristle brush is excellent for smoothing), a hair tie, bobby pins that match your hair colour, and a light-hold hairspray or finishing spray. For a sleeker foundation, you might also consider a smoothing cream or a light gel to tame flyaways before you even begin. Having your tools within arm’s reach will make the process seamless and stress-free.
A Step-by-Step Guide to the Perfect Low Bun
Creating this timeless style is easier than you think. Follow these simple steps for a bun that’s both secure and stylish.1. Create a Low Ponytail: Start by brushing your hair to remove any tangles. Gather your hair into a low ponytail at the nape of your neck. You can part your hair in the middle for a clean, symmetrical look or on the side for a softer feel. Secure it with a hair tie. For an extra secure base that won’t budge, some stylists recommend a hair bungee.2. Twist the Ponytail: Take the length of your ponytail and twist it firmly from the base to the ends, creating a single, rope-like strand. The tighter the twist, the neater your bun will appear.3. Wrap the Bun: Begin wrapping the twisted hair around the base of your ponytail, coiling it flat against your head. Hold the end of the twist in place with one hand as you prepare to pin it.4. Pin It in Place: This is the most critical step. Secure the bun using bobby pins. Instead of just pushing them in, anchor the bun by catching a bit of the bun's edge and then a bit of the scalp hair underneath before pushing the pin in. This 'stitching' motion locks the bun to your head. Continue adding pins around the bun until it feels completely secure.
The Secret to a Secure, All-Day Hold
The difference between a bun that lasts and one that droops by lunchtime is all in the pinning technique. Many people make the common mistake of using the bobby pin with the flat side against the scalp, but the wavy side is designed to grip the hair more effectively. So, always place the wavy side down. For an even stronger hold, try crisscrossing two pins to form an 'X'. This creates an anchor that locks sections in place. Another pro tip is to spray your bobby pins with dry shampoo or a texture spray before using them; this adds a bit of tackiness and prevents them from slipping, which is especially helpful for fine or silky hair. Also, avoid the temptation to open the pin wide and stuff too much hair into it; a bobby pin is most effective when it slides in closed, grabbing just enough hair to create tension.
Customising the Look for Your Hair Type
While the low bun is a universal style, slight adjustments can perfect it for your specific hair texture. For Fine or Thin Hair: To create the illusion of more volume, start by applying a texturizing spray or dry shampoo to give your hair some grip and bulk. When forming the bun, avoid wrapping it too tightly; a looser coil can look fuller. You can also gently 'pancake' the bun by tugging at the edges to fan it out before you finish pinning. Using smaller bobby pins may also provide a better hold without weighing the hair down. For Thick Hair: Your main challenge is managing the weight. Use a strong elastic for your initial ponytail. You may need larger, more heavy-duty bobby pins to secure the bun. If one bun feels too bulky, you can try splitting the ponytail into two sections, twisting each one, and then wrapping them around each other.* For Curly Hair: Embrace your natural texture! The inherent volume of curly hair makes for a beautiful, full-bodied bun. A curl cream can help define your curls and reduce frizz. You may not need to twist your ponytail as tightly; a looser wrap will allow your curls to create a soft, romantic shape.
Finishing Touches and Variations
Once your bun is secure, you can add a few final touches to personalise it. For a softer, more romantic look, gently pull out a few face-framing tendrils. A light mist of hairspray will set the style and tame any remaining flyaways without making it stiff. For a more 'undone' feel, use your fingers to gently pull and loosen small sections of the bun itself, creating texture. You can also elevate the style for a special occasion by adding a decorative pin, a silk ribbon, or a stylish clip. This simple updo serves as a perfect canvas for your own creative expression.