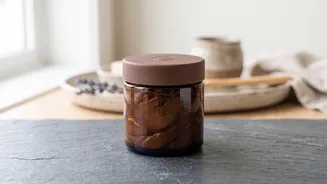







The idea of slathering chocolate on your face sounds like the ultimate indulgence. Rich in antioxidants, chocolate masks promise glowing, hydrated skin. But before you dive in, it’s crucial to know how to do so safely to avoid any unwanted reactions.
The Real Benefits of Cocoa on Skin
Dark chocolate and raw cacao powder are packed with antioxidants called flavonoids. These powerful compounds help protect the skin from damage caused by environmental stressors and UV light. Studies have shown that flavonoids can increase blood flow to the skin, which helps improve hydration and complexion. Additionally, the natural fats found in cocoa butter can provide deep moisturisation for dry and flaky skin. When used in a mask, cocoa can also offer gentle exfoliation, helping to remove dead skin cells and reveal a brighter, smoother appearance. Some proponents even claim it can boost collagen production, which is vital for maintaining skin elasticity and a youthful look.
Read the Label Before You Apply
Not all chocolate face masks are created equal. While the idea of a chocolate mask is appealing, the other ingredients in the product are just as important. Pre-packaged masks can sometimes contain irritants. It's wise to scan the ingredients list for potential red flags such as artificial fragrances, high concentrations of alcohol, parabens, and sulfates, which can strip the skin of its natural moisture and cause irritation. Ingredients like formaldehyde-releasing preservatives (such as DMDM hydantoin) are also best avoided as they can trigger allergic reactions. Instead, look for masks that list cocoa or theobroma cacao high on the ingredients list and are paired with other nourishing components like yogurt, honey, or natural oils like jojoba.
The Golden Rule: Always Patch Test
This is the most critical step before trying any new skincare product, especially one with potent ingredients. A patch test helps you determine if your skin will have an adverse reaction before you apply the mask to your entire face. The American Academy of Dermatology recommends a simple process. First, apply a small, coin-sized amount of the product to a discreet area of skin, like the inside of your elbow or behind your ear. This skin is thin and can be a good indicator of how your more sensitive facial skin will react. Leave the product on for as long as the mask's instructions direct, or for at least 24 hours if it's a leave-on product.
How to Spot a Bad Reaction
During and after the patch test, you need to monitor the area for any signs of irritation. A negative reaction, known as contact dermatitis, can manifest in several ways. Look for redness, itching, burning, a rash, small bumps, or even blisters at the site of application. It’s important to note that some reactions don't happen immediately. Dermatologists often recommend repeating the patch test in the same spot for several days to rule out a delayed hypersensitivity reaction. If you experience any of these symptoms, wash the product off immediately with cool water and discontinue use. If the irritation is severe or doesn't subside, it's best to consult a dermatologist.
Introducing the Mask to Your Routine
If your patch test is successful and shows no signs of irritation after several days, you can feel more confident about applying the mask to your face. For the first application, make sure your face is clean and dry to ensure the mask is as effective as possible. Apply a thin, even layer, avoiding the delicate eye and mouth areas. Follow the product's instructions for how long to leave it on. Don't assume that longer is better; leaving a mask on for too long can sometimes lead to dryness or irritation. Generally, using a hydrating or detoxifying mask like a chocolate one once or twice a week is sufficient to reap its benefits without overdoing it.