




Why Your Garden Loves Compost
Before you start, it helps to know why you're doing this. Composting is nature’s recycling program. By breaking down organic waste, you create a free, powerful soil amendment. This 'black gold' enhances soil quality, improves water retention so you need
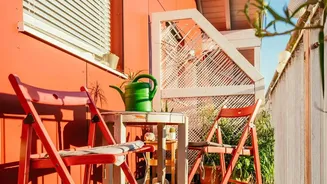
to water less, and reduces the need for chemical fertilizers. It’s a simple action that reduces landfill waste, cuts down on methane emissions, and returns valuable nutrients to the earth, exactly where they belong. Your potted plants, balcony garden, or vegetable patch will become healthier and more productive.
The Perfect Mix: Greens and Browns
A healthy compost pile needs a balance of two things: nitrogen-rich 'greens' and carbon-rich 'browns'. Think of it like making a good cup of chai—you need the right proportions. 'Greens' are the wet, fresh materials that provide nitrogen. This includes your kitchen vegetable peels, fruit scraps, and spent tea leaves or coffee grounds. 'Browns' are the dry, woody materials that provide carbon and create air pockets. This includes dried leaves, shredded newspaper or non-glossy cardboard, and cocopeat or coconut husks. A good rule of thumb is to have roughly two parts brown material for every one part green material. This balance prevents the pile from becoming smelly or slimy.
Your Compost Ingredient List
While vegetable peels and tea leaves are excellent starters, knowing what else to add (and what to avoid) is key to success. You can safely compost all fruit and vegetable scraps, crushed eggshells, and coffee grounds. However, you must avoid adding certain items. Do not add cooked or oily foods, meat, fish, bones, or dairy products. These items can create foul odours and attract unwanted pests like rodents. Also, keep out diseased plants and weeds that have seeds, as the composting process might not be hot enough to destroy them, and you could end up spreading them in your garden later.
Setting Up Your Simple System
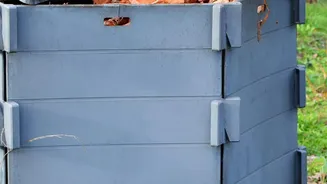
You don’t need a large garden to start composting. For urban homes and balconies, a simple container is perfect. You can use a large bucket, a clay pot, or a small bin with a lid. The most important thing is to ensure it has drainage holes at the bottom for excess moisture to escape and some holes on the sides for air circulation. An easy DIY option is to take a metal or plastic bin and drill several holes in the bottom and sides. Place it in a shady spot on your balcony or in a convenient corner of your home.
The Easy, Step-by-Step Process
Once your bin is ready, follow these simple layers. First, place a layer of coarse brown material like small twigs or coconut husks at the bottom for drainage. Next, add a layer of other browns like dried leaves or shredded paper. Now, add your green layer of vegetable peels and tea leaves. Continue alternating between brown and green layers. Keep the pile moist, like a wrung-out sponge, but not soaking wet. Every few days, use a small rake or stick to turn and mix the pile. This aeration is crucial as it helps the beneficial microorganisms do their work and speeds up decomposition.
Patience and the Final Payoff
Composting is a process of patience. Depending on the materials and conditions, it can take anywhere from a few months to a year for your compost to be ready. You’ll know it’s done when it is dark, crumbly, and smells earthy like a forest floor. It should not have any foul odour, and you shouldn't be able to recognise the original food scraps. Once ready, this nutrient-rich material can be mixed into the soil of your potted plants or used as a top dressing for your garden beds to give them a powerful boost.