






First, A Reality Check of Your Space
Before you can solve the monsoon laundry problem, you have to understand its source: the physical space you have. Forget about the sunny days of summer; your plan now must revolve around your indoor reality. Take a hard look at your flat. Where can clothes
actually hang? Do you have a small balcony that can be shielded from rain? Is there a spare corner in a well-ventilated room? Many people resort to drying clothes on window grills or staircase railings, but this can be inefficient and clutter your home. The goal is to identify a dedicated 'drying zone'. Measure this area. This calculation is the foundation of your entire monsoon laundry strategy. Knowing your capacity—how many clothes can dry effectively at one time—dictates how often you should wash and what tools you'll need.
The Washing Machine Is Your First Dryer
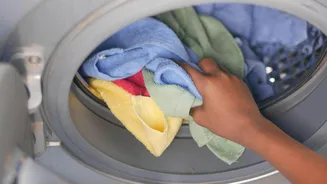
Effective drying begins in the washing machine. Most modern machines have adjustable spin cycles, a feature that is critical during the monsoon. A higher RPM (Revolutions Per Minute) spin cycle wrings out significantly more water from your clothes before they even see the drying rack. If possible, run an extra spin cycle, especially for heavy items like jeans and towels. This single step can dramatically reduce indoor drying time. Also, resist the temptation to overload the machine. Cramming too many clothes in prevents them from being rinsed properly and, more importantly, from spinning out excess water effectively. Washing smaller, more frequent loads is a far better strategy than tackling a mountain of laundry once a week.
Choose Your Drying Tools Wisely
Once your clothes are out of the washer, your choice of drying rack becomes paramount. For small flats, a bulky rack is not an option. Consider space-saving designs like gullwing, accordion, or tiered vertical racks that can be folded away when not in use. A gullwing rack offers flat surfaces for delicate items, while vertical racks maximize drying space without a large footprint. If floor space is non-existent, look into wall-mounted retractable racks or over-the-door options. The key is to ensure enough space between garments for air to circulate. Clothes bunched together will stay damp and develop that dreaded musty smell. If you have a balcony, a ceiling-mounted pulley rack can be a game-changer, allowing you to use outdoor space without sacrificing floor area.
Mastering Airflow and Humidity
The real enemy of indoor drying isn't the rain; it's the humidity it brings. When the air is already full of moisture, evaporation slows to a crawl. To combat this, you need to create your own airflow. Place your drying rack in a room where you can run a fan. Pointing a fan across the clothes, rather than directly at them, helps create a gentle breeze that carries moisture away. If you have an air conditioner, running it can also help as it naturally dehumidifies the air. For those in extremely humid climates, a dehumidifier is a worthy investment. These appliances are designed to pull moisture out of the air, drastically speeding up drying time and preventing the damp, stuffy feeling in your home. Many even have a specific 'laundry mode' for this purpose. Place the dehumidifier in a small, enclosed room with the clothes for maximum efficiency.
Fighting the Musty Odour
Even with the best drying setup, damp smells can creep in. Prevention starts in the wash. Adding half a cup of white vinegar to the rinse cycle can work wonders. Vinegar is a natural antibacterial agent that helps neutralize odours and dissolve detergent residue that can trap smells. Don't worry, the vinegar smell dissipates as the clothes dry. Baking soda is another excellent deodorizer that can be added to the wash. If a garment is already dry but smells musty, don't just spray it with perfume, as this only masks the problem. A quick tumble in a dryer if you have one, or even ironing the slightly damp clothes can help. A hot iron drives out the last traces of moisture and kills odour-causing bacteria.