





Why Your Balcony Drain is a Gnat Magnet
Balcony drains, much like those in your kitchen or bathroom, can become breeding grounds for small insects like drain flies and gnats. Over time, these drains accumulate a slimy layer of organic matter from dust, leaves, and other debris that gets washed
away with water. This damp, decaying gunk provides the perfect environment for gnats to lay their eggs. The larvae feed on this material before maturing into the adult gnats that swarm your outdoor space, often finding their way into your home. This is especially common during the monsoon season when constant moisture accelerates this process. Simply cleaning the drain offers a temporary fix, but without a physical barrier, they will likely return.
The Simple and Affordable Mesh Solution
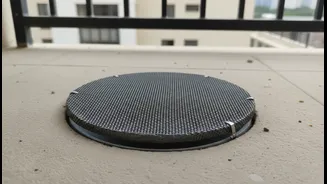
The most effective long-term solution is to block the gnats' entry point with a physical barrier. A fine mesh screen, installed over the drain opening, is a simple, affordable, and highly effective way to do this. The mesh allows water to flow through freely but is fine enough to stop insects, hair, and larger debris from entering the pipes. This not only prevents pests but also helps reduce the frequency of clogs. You don’t need expensive or custom-made covers; a small piece of the right kind of mesh and a few basic tools are all it takes to complete this DIY project in under an hour.
Gathering Your Supplies
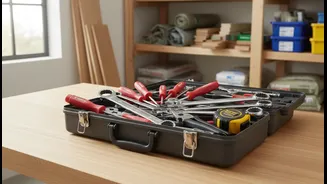
Before you begin, you'll need a few readily available items. Most of these can be found at your local hardware store. Look for stainless steel mesh, as it is durable and will not rust from constant exposure to water. Alternatively, fiberglass insect screen material also works well. You will need: Fine Mesh: A small roll or sheet of stainless steel wire mesh or fiberglass window screening. Ensure the holes are small enough to block gnats. Cutting Tool: A pair of sturdy scissors or tin snips to cut the mesh to size. Measuring Tape: To accurately measure the diameter of your drain. Heavy-Duty Waterproof Adhesive/Sealant: A silicone-based sealant is ideal for creating a secure, waterproof bond around the edges. * Cleaning Supplies: A stiff brush, baking soda, vinegar, and hot water to thoroughly clean the drain area before installation.
Step-by-Step Installation Guide
Follow these simple steps for a secure and effective installation. 1. Thoroughly Clean the Drain: First, remove the existing drain cover. Use a stiff brush to scrub away all visible grime, hair, and slimy buildup from the drain opening and the surrounding area. For a deeper clean, pour a mixture of half a cup of baking soda and half a cup of vinegar down the drain. Let it foam for about 15-20 minutes, then flush it with a pot of boiling water. Allow the area to dry completely. 2. Measure and Cut the Mesh: Measure the diameter of the drain opening. Cut a piece of your mesh so that it is slightly larger than the drain itself, with about one inch of overlap on all sides. This extra material will ensure you have enough surface area to apply the adhesive. 3. Apply the Adhesive: Apply a thin, continuous bead of waterproof silicone sealant around the clean, dry edge of the drain opening on the balcony floor. Be careful not to use too much, as you don't want it to squeeze into the drain pipe itself. 4. Place and Secure the Mesh: Carefully press the cut piece of mesh onto the sealant. Gently push it down to ensure it makes good contact all the way around. Use a small tool or a gloved finger to smooth the edges and embed the mesh into the sealant. If your drain has a removable grate, you can simply cut the mesh to fit snugly underneath it, which may eliminate the need for adhesive. 5. Let It Cure: Allow the sealant to fully cure according to the manufacturer's instructions. This usually takes several hours. Avoid running water onto the area during this time. Once cured, the mesh will be securely fixed in place, creating a formidable barrier against pests.