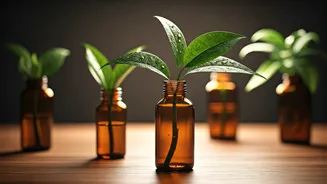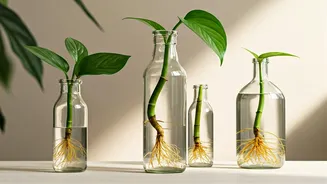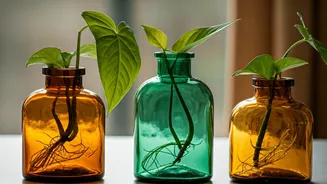


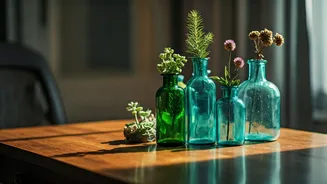


Why Apothecary Bottles Work Wonders
Before we grab our scissors, let’s appreciate why old apothecary or other tinted glass bottles are perfect for this project. Beyond their undeniable vintage charm, these vessels are functionally brilliant for water propagation. The tinted glass—be it
amber, green, or blue—filters sunlight, which significantly slows down the growth of algae in the water. Algae competes with your cutting for nutrients and can make the water look murky. A clean, algae-free environment gives your new plant the best start. Furthermore, the typically narrow neck of an apothecary bottle is ideal for supporting a single stem cutting, holding it upright and ensuring the leaves stay dry while the node remains submerged. It’s a beautiful marriage of form and function that turns a simple gardening task into a piece of decorative art.
Gathering Your Simple Supplies
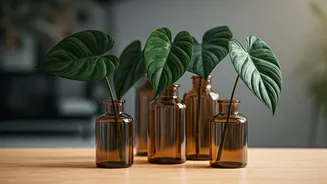
One of the best parts of this project is its simplicity. You don’t need a trip to a specialty store; you likely have everything you need already. Here’s a quick checklist: - **A Healthy Arrowhead Vine (Syngonium podophyllum):** Choose a mature, thriving plant to take cuttings from. Look for a vine with plenty of leaves and visible nodes. - **Clean, Sharp Scissors or Pruners:** A clean cut prevents crushing the plant’s stem, which can hinder water absorption and invite rot. - **Recycled Tinted Glass Bottles:** Any amber, green, or blue glass bottle will do. Wash it thoroughly with soap and water to remove any residue. - **Water:** Room-temperature water is best. If you’re using tap water, it’s a good idea to let it sit out for 24 hours to allow chlorine to dissipate. Filtered or rainwater is even better.
Making the Perfect Cut
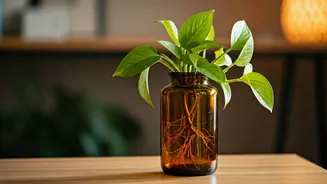
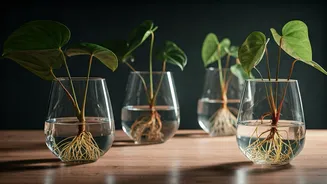
This is the most crucial step, but don’t be intimidated. It’s easy once you know what to look for. Examine the stem of your Arrowhead Vine. You’ll see small, brownish bumps or rings where the leaves meet the stem—these are the nodes. Aerial roots sometimes even sprout from them. These nodes are where new roots will grow. To take a cutting, select a healthy vine and make your cut about half an inch below a node. Your cutting should be about 4-6 inches long and have at least two or three leaves on it. You can also remove the lowest leaf (the one closest to the cut) to ensure no leaves are submerged in the water, as they will rot. Taking two or three cuttings is a good strategy to ensure at least one successfully roots.
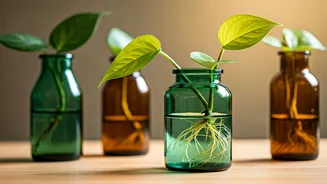
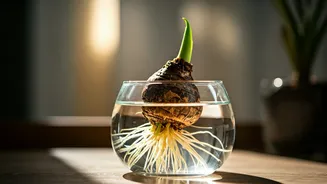
The Propagation Process
With your cuttings prepared and your bottles cleaned, the rest is a waiting game. Fill your apothecary bottle with enough room-temperature water to submerge the node (or nodes) on the stem. Place the cutting into the bottle, using the narrow neck to support it. Now, find a good spot for your new plant-to-be. Arrowhead Vines thrive in bright, indirect light. A spot near a window that doesn’t receive harsh, direct sun is perfect. Direct sun can be too intense and may scorch the leaves. The most important part of ongoing care is to change the water every 3-5 days. This replenishes oxygen and keeps the environment clean, preventing bacterial growth and ensuring your cutting stays healthy as it develops its new root system.
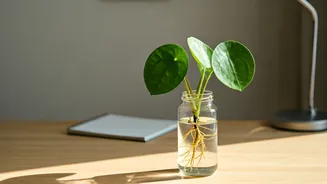
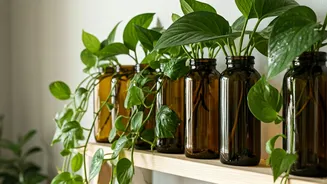
Watching for Roots and Next Steps
Patience is a virtue, but luckily, Arrowhead Vines are eager to grow. You should start to see small, white roots emerging from the nodes within one to two weeks. Over the next several weeks, these will grow into a more substantial root system. You have two options once the roots are about two inches long. You can either keep the plant in the bottle indefinitely, creating a beautiful permanent water culture display (a hydroponic setup), or you can transplant it to soil. If you keep it in water, you’ll need to add a drop of liquid fertiliser every month or so to provide nutrients. If you choose to pot it, select a small pot with drainage holes and use a standard, well-draining potting mix. Water it well and keep the soil consistently moist for the first few weeks to help the water-grown roots acclimate to their new soil environment.