




The Late-Night Snack Dilemma
We’ve all been there. Dinner was hours ago, and a familiar rumble starts in your stomach. You want a snack, but not just any snack. It needs to have crunch. It needs to have flavour. And ideally, it shouldn't leave you feeling sluggish or guilty. The
usual suspects—potato chips, instant noodles—are easy, but they don’t always hit the right note. This is where the magic of the sweet potato comes in. Naturally sweet, packed with nutrients, and incredibly versatile, it’s the hero your snack pantry has been waiting for. The problem? Traditional sweet potato chips take time, often ending up limp and disappointing. But this isn’t a traditional recipe; it’s a hack designed for an immediate craving.
The Hack: Microwave Meets Oven
The secret to a genuinely crispy sweet potato snack without deep-frying is a two-step process that uses your microwave. The biggest enemy of crispiness is moisture. By pre-cooking the sweet potato slices in the microwave, you rapidly draw out a significant amount of water. This initial dehydration step dramatically cuts down on the oven time and ensures the final product is a light, airy crisp rather than a soft, roasted vegetable. It’s a technique used in professional kitchens to get ultra-crispy potatoes, and it works wonders here. This shortcut is what makes the snack achievable in under 20 minutes, perfect for an impromptu treat.
Step 1: The Perfect Slice
This is the most important step, and precision is key. For a true crisp, your sweet potato slices must be incredibly thin and uniform. The best tool for the job is a mandoline slicer. Set it to its thinnest setting (usually 1-2 mm) and carefully slice the potato into paper-thin rounds. If you don’t have a mandoline, a very sharp knife and a steady hand can work, but focus on getting the slices as consistent as possible. Uneven slices will cook at different rates, leaving you with a mix of burnt and soggy bits. Wash and dry your sweet potato thoroughly before slicing, but there’s no need to peel it—the skin adds a nice texture and rustic look.
Step 2: The Microwave Dehydration
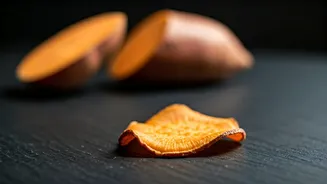
Arrange the sweet potato slices in a single layer on a microwave-safe plate lined with a paper towel. Do not let them overlap, as this will cause them to steam instead of dry out. You will likely need to do this in batches. Microwave on high for 2-3 minutes. The slices will start to look dry and may begin to curl at the edges. They won’t be crispy yet, but they will have lost most of their internal moisture. This is the core of the hack, setting you up for success in the final stage.
Step 3: Seasoning and Oiling
Once all your slices are pre-cooked, transfer them to a bowl. Drizzle with a small amount of oil—about one teaspoon of olive oil or coconut oil is plenty for one medium sweet potato. Toss gently to coat. Now for the fun part: seasoning. For a classic savoury crisp, a generous pinch of sea salt, black pepper, and smoked paprika is fantastic. For something with a bit of a kick, add a dash of cayenne pepper. If you’re leaning into the sweet potato’s natural sweetness, a sprinkle of cinnamon and a tiny pinch of sugar creates an irresistible sweet-and-savoury flavour. Toss again to ensure every slice is evenly seasoned.
Step 4: The Final Crisp-Up
You have two great options here. For an oven, preheat it to 200°C (400°F). Spread the seasoned slices in a single layer on a baking sheet lined with parchment paper. Bake for 8-12 minutes, flipping halfway through. Watch them like a hawk during the last few minutes, as they can go from golden to burnt very quickly. If you have an air fryer, set it to 190°C (375°F) and cook for 5-8 minutes, shaking the basket halfway through. The crisps are done when they are golden brown and crunchy. Let them cool for a minute on the pan; they will become even crispier as they cool.