


The Golden Rule: Don't Plug Directly
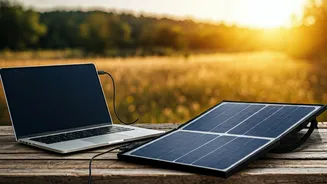
First, let's clear up a common misconception. You almost never plug a solar panel directly into your laptop. Why? Solar panels produce a variable amount of power that fluctuates with the sun's intensity. A passing cloud can cause the voltage to drop,
potentially confusing or even harming your laptop's sensitive charging circuits. The flow of power is simply too unstable for direct use. Instead, the standard and safest method involves three key components: the solar panel (to capture energy), a power bank or solar generator (to store that energy), and your laptop (to use the energy). Think of it this way: the panel fills a bucket with water, and your laptop drinks steadily from the bucket, not from the unpredictable rain shower itself.
Understanding the Power Math (The Easy Way)
To choose the right gear, you only need to grasp two simple concepts: Watts (W) and Watt-hours (Wh). **Watts (W):** This measures the rate of power, like the speed of water flowing into our bucket. A 100W solar panel can, under perfect conditions, generate 100 watts of power at any given moment. Your laptop charger also has a wattage rating (e.g., 45W, 65W, 90W), which is the maximum speed at which it can draw power. **Watt-hours (Wh):** This measures energy capacity, like the size of our bucket. A 500Wh power bank can deliver 500 watts for one hour, or 50 watts for 10 hours. Your laptop battery also has a capacity measured in Wh. A typical ultrabook might have a 50-70Wh battery. Your goal is simple: use a panel with enough watts to fill a power bank with enough watt-hours to keep your laptop charged.
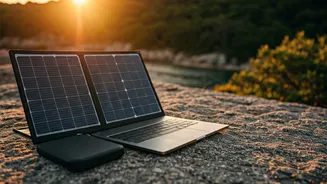
Component 1: The Solar Panel
This is your energy harvester. When choosing a panel, the main specification to focus on is its wattage. For laptop charging, a 100W panel is a great starting point. While a 50W panel might work, it will charge your power bank very slowly, especially on partly cloudy days. Under real-world Indian sun, expect a 100W panel to consistently produce about 60-75W. Look for panels that are foldable for portability and made from monocrystalline cells, which are generally more efficient than polycrystalline types. Many come with different connectors, but you'll typically be plugging it into your power bank, not your laptop.
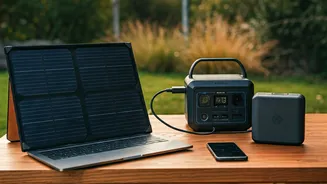
Component 2: The Power Bank or 'Solar Generator'
This is the heart of your off-grid system. It smooths out the power from the panel and provides a stable source for your laptop. You have two main choices: **1. High-Capacity USB-C Power Bank:** If you have a modern laptop that charges via USB-C (like a MacBook Air or many Dell XPS models), a large power bank with USB-C Power Delivery (PD) is a lightweight and efficient option. Look for one with at least a 65W output and a capacity of 20,000mAh (about 74Wh) or more. **2. Portable Power Station (or 'Solar Generator'):** This is a much larger battery pack with a built-in AC outlet, just like the one in your wall. This is the most versatile option, as it can power any laptop, regardless of its charger type. For laptop use, a model with a capacity of 300Wh to 500Wh is a good balance of portability and power, offering multiple full laptop charges.
Putting It All Together: A Real-World Setup
Let's imagine you have a laptop with a 65W charger and a 70Wh internal battery. You want to work for a full day, say 8 hours. **Your Gear:** A 100W portable solar panel and a 500Wh portable power station. **The Process:** 1. You set up your 100W panel in direct sunlight. You plug it into the DC input of your 500Wh power station. 2. On a good sunny day, the panel might be feeding 70W of power into the station. In about 7 hours, it could fully recharge the station from empty (500Wh / 70W ≈ 7.1 hours). 3. Simultaneously, you plug your laptop's 65W charger into the AC outlet of the power station. You can work all day. 4. The 500Wh station has enough capacity to recharge your 70Wh laptop about seven times over. This gives you a massive buffer for cloudy days or charging other devices like your phone and lights.