





Why This Quick Check Is Crucial
In the rush to get a meal on the table, it's easy to overlook the basics. However, when it comes to pressure cooking, a quick pre-use inspection is non-negotiable. The appliance works by building up a significant amount of steam pressure to cook food
at temperatures as high as 120°C. This high-pressure environment is what makes it so efficient, but it also requires every component to function perfectly. A blocked vent, an overfilled pot, or a faulty seal can lead to everything from a messy kitchen counter to serious safety hazards. This three-step check—covering the fill level, vent, and gasket—is your best defence against common problems. It ensures the cooker can regulate pressure correctly, preventing accidents and guaranteeing your food cooks exactly as it should.
Step 1: Get the Fill Level Right
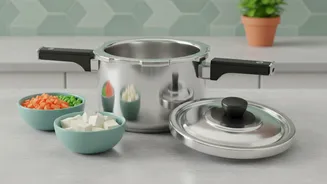
One of the most common mistakes is overfilling the cooker. There are two simple rules to follow. For most foods, never fill the inner pot more than two-thirds full. This leaves enough space for steam to build and circulate. For foods that expand or froth during cooking—like dal, rice, beans, and grains—you should be even more cautious. In these cases, fill the cooker only up to the halfway mark. Overfilling can cause food particles and foam to be forced into the steam vent, blocking it and interfering with pressure regulation. This can lead to liquid sputtering out of the valve, creating a mess and impacting the final dish.
Step 2: Inspect the Vent and Safety Valves
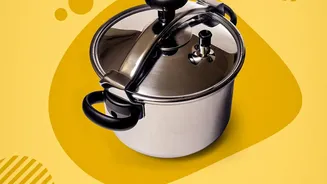
The steam vent, or vent tube, is the primary channel for releasing excess pressure. Before securing the lid, always check that this opening is completely clear of any food debris or buildup. A simple way to do this is to hold the lid up to a light source and look through the vent hole. If it appears blocked, use a small brush or a toothpick to gently clean it out. A clogged vent can prevent the cooker from reaching the correct pressure or, more dangerously, from releasing it safely. This component is critical for the safe operation of your cooker, so this check should never be skipped. Along with the main vent, ensure any other safety valves on the lid are also clean and can move freely.
Step 3: Examine the Gasket (Sealing Ring)
The rubber or silicone gasket is what creates the airtight seal between the lid and the pot, allowing pressure to build. Before each use, remove the gasket and give it a quick inspection. Look for any signs of cracking, brittleness, warping, or tearing. A damaged gasket will fail to create a proper seal, causing steam to leak from the sides of the lid and preventing the cooker from reaching full pressure. This will significantly increase cooking times and may result in undercooked food. Most manufacturers recommend replacing the gasket every one to two years, depending on usage. If your gasket feels sticky, has become too hard, or no longer fits snugly in the lid, it's time for a replacement.