

Understanding Your Wild Yeast Starter
A sourdough starter is a live culture of wild yeasts and beneficial bacteria, cultivated by mixing flour and water and allowing it to ferment. Unlike commercial yeast, this natural leaven works more slowly, breaking down gluten and starches in the flour,
which creates sourdough's signature tangy flavour and can make it easier to digest. This thriving ecosystem is what will give your bread its rise, structure, and complex taste. The process is a simple science experiment that requires patience more than anything else. The microorganisms are naturally present in the flour and the environment, waiting for the right conditions to come alive.
Choosing the Right Indian Flour
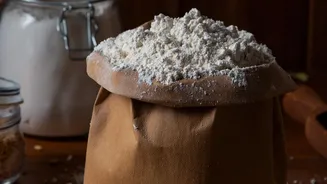
You don't need special or imported flour to begin. Common Indian flours like whole wheat atta and all-purpose flour (maida) work wonderfully. Whole wheat atta is often recommended for starting because the bran contains more of the wild yeasts and microbes needed to kickstart fermentation. This can make your starter become active more quickly. Many bakers find success using a 50:50 blend of atta and maida to get the best of both worlds: the microbial activity from the whole wheat and the lighter structure from the refined flour. As atta absorbs more water than maida, you may need to slightly adjust your water quantity to achieve the right consistency.
Day 1-2: Creating the Mix
To begin, you will need a clean glass jar, flour, and filtered or RO water. Using water that isn't chlorinated is important, as chlorine can inhibit the growth of the natural yeasts. In your jar, combine equal parts by weight—for example, 50 grams of whole wheat atta and 50 grams of water. Mix thoroughly until no dry flour remains, cover loosely with a cloth or lid (don't seal it airtight), and leave it on your kitchen counter. For the first 24 to 48 hours, you may not see much activity, perhaps just a few small bubbles.
Day 3-6: The Daily Feeding Ritual
From day three onwards, you will begin a daily feeding schedule. The process is simple: discard about half of the starter, and then add fresh flour and water, typically in the same equal-part measurements you started with. This 'discard and feed' process removes waste products and provides fresh food for the yeast and bacteria to thrive. During these days, the starter's smell might change from yeasty to slightly sour. You will start to see more consistent bubbling and an increase in volume a few hours after each feeding. The warm Indian climate can often speed up this process.
Day 7 and Beyond: Is It Ready?
After about a week, your starter should be consistently active. A key sign of readiness is that it reliably doubles or even triples in volume within 4-8 hours of feeding and is filled with bubbles. It should have a pleasant, tangy, and slightly sweet or alcohol-like aroma. A popular method to test its strength is the 'float test': drop a small spoonful of your active starter into a glass of water. If it floats, it's full of trapped gas and ready to leaven your first loaf of bread. If it sinks, it may need a few more days of consistent feeding to build more strength.
Maintaining Your Starter in an Indian Climate
Once your starter is active, you don't need to feed it daily unless you bake every day. For weekly bakers, the refrigerator is your best friend. Feed your starter, let it sit at room temperature for about an hour, and then store it in the fridge. This slows down fermentation. You'll only need to feed it about once a week to keep it healthy. In hotter, more humid weather, you might notice your starter ferments very quickly. If so, consider feeding it twice a day or using a slightly smaller ratio of starter to fresh flour and water to keep it from becoming overly acidic.