
What is a Sourdough Starter?
A sourdough starter is a living culture of flour and water. It traps wild yeast and beneficial bacteria from the environment, which ferment the flour and create the natural leavening needed to make bread rise without any commercial yeast. Think of it as a low-maintenance
pet that you feed with flour and water, and in return, it provides the foundation for incredibly flavourful and digestible bread. This process has been used for centuries, long before commercial yeast was available.
Choosing Your Indian Flour
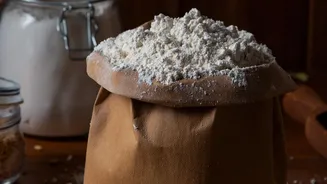
You don't need fancy bread flour to begin. The two most common flours in any Indian kitchen, atta (whole wheat flour) and maida (all-purpose flour), work wonderfully. In fact, atta is an excellent choice for starting because the bran and germ contain more of the wild yeasts and microbes needed for fermentation. This often means an atta-based starter will become active more quickly. A popular and effective approach is to use a 50:50 blend of atta and maida, which gives you the microbial benefits of whole wheat and the lighter texture of refined flour.
Your 7-Day Starter Guide
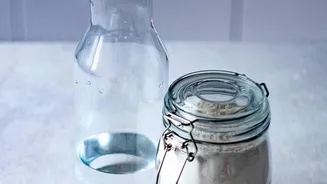
You'll need a clean glass jar (at least 1-litre capacity), your chosen flour, and filtered or RO water. Avoid chlorinated tap water, as it can kill the good bacteria you're trying to grow. Let's begin! Day 1: In your jar, mix 50g of atta (or your 50:50 blend) with 50g of room temperature water. Stir until no dry flour remains. The consistency should be like a thick paste. Cover the jar loosely—a cloth secured with a rubber band or just placing the lid on top without sealing it works well. Place it in a warm, but not hot, spot in your kitchen. Day 2: You might see a few tiny bubbles, or you might see nothing. Both are normal. Just give the mixture a good stir and cover it again. Day 3: Today, you'll start the feeding schedule. You might see more bubbles and a slightly sour smell. Discard about half of your starter. To the remaining starter, add 50g of your flour blend and 50g of water. Mix well, mark the level with a rubber band, and cover loosely. Days 4-6: Continue the process of discarding half and feeding the remainder with equal parts flour and water every 12-24 hours. India's warmer climate often speeds up fermentation, so you may need to feed it more frequently. If your starter rises and falls quickly, it's a sign it's hungry and needs feeding. Don't be discouraged if activity seems to slow down around Day 4; this is a common quiet phase before the yeast culture becomes dominant. Day 7: By now, your starter should be bubbly and active, with a pleasantly tangy, yeasty smell. It should reliably double in volume within 4-8 hours of feeding.
Is Your Starter Ready to Bake?
An active, bake-ready starter will have a light, airy, and spongy texture, full of bubbles. The most reliable sign is its predictable rise and fall; it should double in size a few hours after feeding. You can also try the 'float test': drop a small spoonful of the starter into a glass of water. If it floats, it's full of gas and ready for baking. However, this test isn't always foolproof, so rely more on the visual cue of the starter doubling in size.
Troubleshooting in a Warm Climate
Indian kitchens are often warmer and more humid, which is great for fermentation but requires some adjustments. Heat makes everything faster. If you feed your starter and come back 8 hours later to find it flat, it likely didn't fail to rise—it probably rose, peaked, and collapsed while you weren't looking. If you see a dry 'tidemark' on the inside of the jar above the starter level, that's exactly what happened. The solution is to check on it sooner, perhaps 3-4 hours after feeding. Alternatively, you can feed it a larger ratio of flour and water (e.g., 1 part starter to 5 parts flour and 5 parts water) to give it more food to work through, slowing down the cycle.