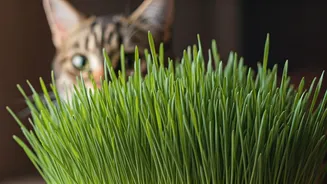


The Benefits of a Living Snack
You might see it labelled 'cat grass' in pet stores, but this lush greenery is often wheatgrass—the young shoots of the wheat plant. [11] Unlike outdoor lawn grass, which can be treated with harmful pesticides, a home-grown patch is a safe and healthy
treat. The primary benefit is digestive. The fiber in wheatgrass helps promote regular bowel movements, preventing constipation and assisting in the passage of hairballs through the digestive tract. [1, 7, 10] Beyond fiber, wheatgrass is packed with nutrients not always present in commercial cat foods, including vitamins A, C, and E, plus chlorophyll and essential minerals. [2, 4, 6] It also provides crucial mental stimulation and enrichment for indoor cats, satisfying their instinct to chew on plants and giving them a 'job' to do. [3, 11]
Gathering Your Simple Supplies
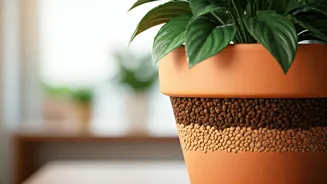
Starting your own wheatgrass patch is remarkably simple and doesn't require a green thumb. You only need a few basic items. First, you'll need seeds; look for organic hard winter wheat seeds, often called wheatberries, to ensure they're free from any chemical treatments. [2, 9] Next, you'll need a shallow container with drainage holes. A small planter, a repurposed food container, or even a pie pan will work perfectly. [15, 16] The third essential is a growing medium. A standard organic potting soil is the most common choice, though soilless hydroponic kits are also available for a mess-free option. [8, 9] Finally, you'll just need water and a spot in your home that receives indirect sunlight. [9]
A Quick 10-Day Growth Guide
The 'quick' in the headline is no exaggeration; you can go from seed to snack in about a week to 10 days. [10]
1. Soak the Seeds: Measure out a couple of tablespoons of wheatberries and soak them in a jar of water for 8 to 12 hours. This kick-starts the germination process. [8, 9]
2. Plant: Fill your container with about two inches of pre-moistened soil. After soaking, drain the seeds and spread them evenly in a single layer across the soil surface. Gently press them in, but you don't need to bury them deeply. [16]
3. Cover and Wait: Lightly cover the seeds with a thin layer of soil. To keep the seeds moist, you can cover the container with a plastic lid or wrap for the first couple of days. [16] Place it in a low-light area.
4. Water and Sun: Once you see sprouts emerge (usually in 2-3 days), remove the cover and move the container to a spot with bright, indirect sunlight. [9] Water daily with a spray bottle to keep the soil moist but not waterlogged.
5. Harvest Time: In about 7 to 10 days, the grass should be 4-6 inches tall and ready for your feline connoisseur. [11, 14]
Serving and Safety First
When you first introduce wheatgrass, let your cat lead the way. You can simply place the pot on the floor and allow them to nibble freely. [1] Some cats will dive right in, while others may need encouragement. You can snip a few blades and offer them by hand or chop them up and sprinkle them over your cat's regular food. [12] While wheatgrass is safe, moderation is key. Eating too much, especially at first, can sometimes cause mild stomach upset or vomiting. [5, 11] If your cat tends to overindulge, it’s best to limit access to short, supervised sessions each day. [6, 13] And don't worry about the name—wheatgrass is harvested before the gluten-containing grain develops, making it gluten-free and safe for sensitive pets. [4, 6]