





Step 1: Choose Your Zone Wisely
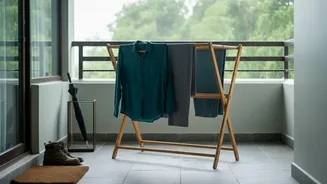
The first step is to designate a specific area as your official drying zone. This shouldn't be just any corner. Look for a spot with good ventilation, like a covered balcony or a room with a window you can crack open when the rain stops. If possible,
choose a low-traffic area to avoid constant run-ins with your drying rack. Proximity to a power outlet is also a major plus for running a fan or a dehumidifier, which are game-changers in humid conditions. The idea is to contain the dampness to one manageable area, protecting the rest of your home from moisture and that all-too-familiar monsoon smell.
Step 2: Gear Up with the Right Racks
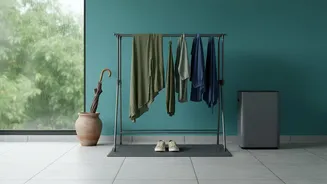
Not all drying racks are created equal, especially when space is a premium. For small apartments, vertical or tiered racks are a lifesaver, allowing you to use upward space instead of valuable floor space. These come in various foldable designs that can be tucked away when not in use. If you have absolutely no floor space to spare, consider wall-mounted or even ceiling-mounted pulley systems. These keep clothes completely out of the way and can use the warmer air that collects near the ceiling to speed up drying. When hanging clothes, give each item enough space to breathe. Overcrowding a rack traps moisture and is a primary cause of musty odours.
Step 3: Tackle Shoes and Umbrellas
Wet clothes are only part of the problem. A soggy pair of shoes can take days to dry and develop a permanent funk if not handled correctly. Never place shoes directly on a heater or in harsh sunlight, as this can damage the material and glue. A safer and effective method is to stuff them with crumpled newspaper, which absorbs moisture from the inside. For faster results, place them near a fan. For umbrellas, avoid leaving them open on the floor where they become a tripping hazard. A tall basket or a dedicated umbrella stand near the entrance is the perfect parking spot. Shake off excess water outside before bringing them in and leave them partially open in the stand to dry completely.
Step 4: Master the Airflow
In the high humidity of the monsoon, simply hanging clothes isn't enough; you need to manage the air itself. Air circulation is key to whisking moisture away from fabrics. Positioning a pedestal or table fan to blow air across your drying rack can dramatically cut down drying time. For an even more powerful solution, consider investing in a dehumidifier. A dehumidifier actively pulls moisture from the air, creating a less humid micro-environment that is perfect for drying clothes and preventing mould growth. Many experts agree that keeping indoor humidity below 60% is crucial for preventing mould.
Step 5: Banish Bad Odours and Mould
The ultimate goal is not just dry clothes, but fresh-smelling ones. That dreaded damp smell is caused by bacteria and mould that thrive in moist environments. A few simple tricks can help. Ensure your washing machine's final spin cycle is on the highest setting to extract as much water as possible before hanging. Some people find that adding a small amount of white vinegar to the final rinse can help neutralise odour-causing bacteria. For your drying zone, placing bowls of rock salt or activated charcoal nearby can help absorb excess moisture and odours naturally. Regular cleaning of the area is also important to prevent any mould from taking hold.