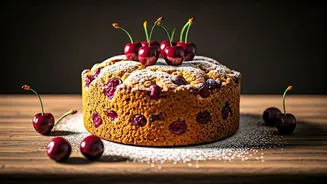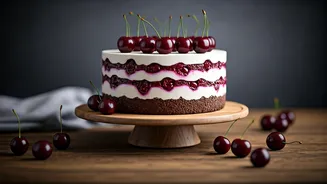


Our 'Rain Washed' Secret
The term 'rain washed' might sound poetic, and that's because it is. It’s our name for the beautiful, glistening finish this cake has, thanks to a simple sugar glaze brushed over the top after baking. This final touch not only adds a delicate sweetness
but also makes the cherries on top sparkle as if they’ve been kissed by a fresh drizzle of rain. It elevates a simple fruit cake into something truly special, giving it a professional look with minimal effort. This glaze also helps to seal in the cake's moisture, ensuring it stays fresh and delicious for days.
Gathering Your Ingredients
A great cake starts with good ingredients. This recipe uses pantry staples to keep things simple for beginners. You will need: For the Cake: - 200g all-purpose flour - 1 teaspoon baking powder - 150g unsalted butter, softened to room temperature - 150g light brown sugar - 3 large eggs - 1 teaspoon vanilla extract - 200g glacé cherries, halved - 50g mixed peel (optional, for extra flavour) - Zest of one lemon For the 'Rain Washed' Glaze: - 50g caster sugar - 3 tablespoons of water or cherry juice
A Simple, Step-by-Step Method
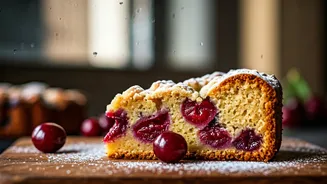
1. Preparation is Key: Preheat your oven to 160°C (150°C Fan). Grease and line a 20cm (8-inch) round cake tin or a 900g (2lb) loaf tin with baking paper. This is a crucial step for fruit cakes, as they bake low and slow and lining prevents the outside from burning. 2. Toss the Fruit: In a small bowl, toss your halved glacé cherries and mixed peel with a tablespoon of the flour. This light coating helps prevent the fruit from sinking to the bottom of the cake during baking, ensuring a perfect distribution in every slice. 3. Cream Butter and Sugar: In a large bowl, use an electric mixer (or a wooden spoon and some elbow grease) to beat the softened butter and brown sugar together until the mixture is light, pale, and fluffy. 4. Add Eggs and Vanilla: Beat in the eggs one at a time, adding a tablespoon of flour with the last egg to prevent the mixture from curdling. Once combined, stir in the vanilla extract and lemon zest. 5. Fold in Dry Ingredients: Gently fold in the remaining flour and baking powder using a large metal spoon or spatula. Be careful not to overmix; stop as soon as you can no longer see streaks of flour. 6. Add the Fruit: Carefully fold in the flour-dusted cherries and mixed peel until they are evenly distributed throughout the batter. 7. Bake to Perfection: Spoon the thick batter into your prepared tin and smooth the top. Bake in the centre of the preheated oven for about 60-75 minutes. The cake is ready when it's golden brown and a skewer inserted into the centre comes out clean.
Applying the Glistening Glaze
While the cake is cooling slightly in its tin, prepare the 'rain washed' glaze. It's incredibly simple. Just place the caster sugar and water or cherry juice into a small saucepan. Heat gently, stirring until the sugar has completely dissolved. Bring the mixture to a simmer for one minute to form a light syrup. Once your cake has been out of the oven for about 10 minutes, use a pastry brush to gently apply the warm glaze over the top surface. Be generous, allowing it to pool around the cherries. As the cake and glaze cool, it will set into a beautiful, shiny finish.
Tips for Fruit Cake Success
Even seasoned bakers can be wary of fruit cake. Here are some beginner-focused tips to guarantee a perfect result every time. - Don't Rush the Bake: Fruit cakes need to be baked at a lower temperature for longer than a typical sponge. This ensures the dense, fruit-filled centre cooks through without the edges becoming dry or burnt. - Lining the Tin is Non-Negotiable: For a long bake, a protective layer of baking paper is essential to prevent the outside from over-baking before the middle is done. - Cool Completely: Allow the cake to cool fully in the tin before attempting to remove it. Fruit cakes are delicate when warm and can break easily. Once completely cool, they become much sturdier. - Storage is Simple: This cake is delicious eaten fresh but also keeps wonderfully. Wrap the cooled cake in a layer of baking paper and then foil. It will stay moist and flavourful at room temperature for up to a week.