




The Enemy Inside the Bag: Freezer Burn
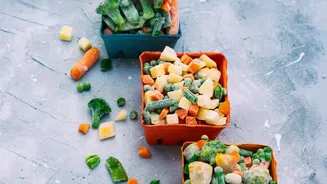
Freezer burn is the unfortunate result of moisture loss from your food while it’s stored in the freezer. It happens through a process called sublimation, where water molecules escape from the frozen food directly into the cold, dry air of the freezer,
turning from a solid (ice) into a gas without ever becoming liquid. This dehydration leaves behind dry, tough, and discoloured patches. While freezer-burned food is generally safe to eat, its texture and flavour are significantly compromised. Meats can become leathery and grey, vegetables shrivelled, and ice cream develops an unpleasantly gritty layer of ice. The culprit that accelerates this process is air trapped inside the freezer bag, which creates the perfect environment for moisture to escape from the food's surface.
Why Removing Air is Your Best Defence
Think of air as the enemy of freshness. When you seal a freezer bag with air still inside, you are trapping a small pocket of atmosphere around your food. This trapped air, even when cold, allows for the sublimation process to occur, drawing moisture out of your food and forming those dreaded ice crystals on its surface. Removing as much air as possible does two critical things. First, it minimises oxygen exposure, which reduces the chances of oxidative changes that affect flavour and colour. Second, it ensures the freezer bag clings tightly to the surface of the food, creating a barrier that makes it much harder for moisture to escape. A bag with less air is also more compact, making it easier to stack and organise, which helps keep your freezer tidy and efficient.
Method 1: The Simple Squeeze
The most basic method is one you are likely already doing: manually pressing the air out. After placing your food in the bag, lay it on a flat surface. Before sealing the final corner, carefully press down on the bag with your hands, starting from the bottom and working your way up to the opening. This pushes most of the air out. Once you’ve squeezed out as much as you can, seal the bag completely. While this method is better than nothing, it's difficult to remove all the air, especially around irregularly shaped items. Air pockets will inevitably remain, leaving your food vulnerable. It's a good first step, but for better, longer-lasting results, there are more effective techniques that don't require expensive gadgets.
Method 2: The Water Displacement Trick
This clever technique uses the pressure of water to force nearly all the air out of a bag, creating a result that is remarkably close to a professional vacuum seal. Start by placing your food in a zip-top freezer bag and sealing it almost completely, leaving just a small corner open. Next, fill a large bowl or your kitchen sink with cool water. Slowly submerge the bag into the water, ensuring the unsealed corner stays above the waterline. You will see the water pressure immediately begin to push the air out of the bag, causing the plastic to cling tightly to your food. Continue lowering the bag until only the unsealed corner is above the water. Once all the air is out, press the final corner of the seal shut before lifting the bag out of the water.
Method 3: The Humble Straw Technique
Another highly effective and low-cost method involves a simple drinking straw. This technique is excellent for getting those last stubborn pockets of air out. Place your food in the bag and seal it almost all the way, leaving just enough space to insert a straw. Insert the straw into the opening, ensuring it doesn't touch the food itself. Now, simply suck the remaining air out of the bag through the straw. You’ll see the bag shrink and tighten around the contents. Once you’ve removed the air, quickly pinch the straw flat, slide it out, and press the final section of the seal closed. This simple trick is surprisingly effective for achieving a near-vacuum seal without any special equipment.
A Few Final Tips for Freezing Success
Beyond just removing air, a few other habits can improve the quality of your frozen goods. Always let hot food cool down completely before bagging and freezing it; placing warm items in the freezer can cause surrounding foods to partially thaw and refreeze, increasing the risk of freezer burn. Whenever possible, freeze items flat. This not only makes them easier to stack and store but also helps them freeze faster and more evenly. Finally, always label and date your bags. It’s easy to forget what’s inside or how long it’s been there. Following a “first in, first out” system ensures you’re always using the oldest items first, reducing waste and enjoying food at its best quality.