





The Foundational Braided Bun
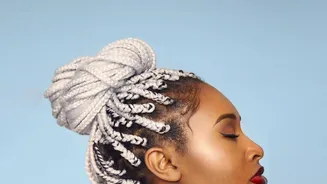
Every great updo starts with a solid foundation, and the classic braided bun is as straightforward as it gets. This style relies on one simple principle: a braid provides texture that gives bobby pins something to grip, creating a hold that lasts far
longer than a bun made from smooth, unbraided hair. To begin, pull your hair into a ponytail at your desired height—a low ponytail at the nape of your neck offers a more classic and formal feel, while a high ponytail at the crown is more casual and sporty. Secure it firmly with a hair tie. Next, apply a light spritz of hairspray or a texturizing product to the ponytail to tame flyaways and add grip. Braid the entire length of the ponytail using a standard three-strand plait and secure the end with a small, clear elastic. The key to a long-lasting bun is to braid firmly; a loose braid can slip and cause the bun to unravel.
Coil and Secure for All-Day Hold
Once your braid is complete, the final steps are simple. Coil the braid tightly around the base of the ponytail, tucking the end underneath the bun as you finish. For a fuller look, you can gently tug on the edges of the braid before you start coiling to 'pancake' it, giving the illusion of thicker hair. Once coiled, it's time to pin it in place. For maximum security, use bobby pins in a crisscross 'X' pattern. Push one pin through the edge of the coiled braid into the base of your hair, then slide a second pin over the first in the opposite direction to lock it. A few of these strategically placed X-pins will hold the bun securely all day long, through work, workouts, and everything in between.
Variation 1: The Elegant Crown Braid
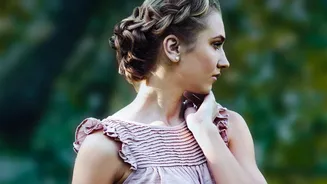
For a style that looks intricate but is surprisingly achievable, try a crown braid bun. This variation involves braiding the hair around your head before forming the bun. One of the easiest methods is to part your hair into two low pigtails. Braid each pigtail and secure the ends. Then, lift one braid up and over the top of your head like a headband, pinning it in place behind the opposite ear. Do the same with the second braid, laying it beside the first one and tucking the ends away neatly. Another approach involves starting a Dutch or French braid on one side of your head, braiding along the hairline, and incorporating more hair as you go until you've circled your entire head. This creates a seamless braided halo that instantly elevates your look.
Variation 2: Playful Double Buns
Also known as 'space buns', this youthful style is both fun and incredibly secure. Start by parting your hair straight down the middle from front to back, creating two equal sections. Tie each section into a high pigtail. Braid each pigtail and secure the ends. Then, coil each braid around its base to create two symmetrical buns. Pin them securely. This style is particularly great for active days because splitting the hair's weight into two smaller buns makes them less likely to loosen with movement compared to a single, heavy bun. For added volume, you can gently pull the braids apart before coiling them.
Tips for Different Hair Types
The braided bun works for nearly all hair types with a few minor adjustments. If you have fine or thin hair that tends to create small, knot-like buns, try backcombing the ponytail lightly before braiding to add volume. A Dutch braid (crossing strands under instead of over) also creates a fuller, more raised plait that makes the final bun appear larger. For very smooth or silky hair, working with second-day hair is ideal as it has more natural texture. If your hair is freshly washed, a bit of dry shampoo or texturizing mousse can provide the necessary grip for the style to hold. For curly hair, work with your natural texture by braiding whole curl clumps together rather than trying to separate them perfectly, which can cause frizz.