





Before You Begin: Prepping Your Hair
A great braid starts with good preparation. First, thoroughly brush or comb your hair to remove all knots and tangles. Smooth hair is much easier to section and weave. While you can braid freshly washed hair, many stylists find that second-day hair offers
more grip and texture, which helps the braid hold its shape better. If your hair is clean and slippery, a light mist of dry texture spray can add the grit you need. This quick prep step ensures the braiding process is smoother and the final result is cleaner.
Step 1: Divide and Conquer
To start, gather your hair. For beginners, creating a low side ponytail secured with an elastic makes the process much easier, as you can see your work in a mirror. If you're more confident, you can simply gather your hair at the nape of your neck. Once gathered, divide the hair into two large, equal sections. Unlike a traditional three-strand braid, a fishtail only requires two. This is the simple foundation upon which the entire intricate pattern is built.
Step 2: The Weaving Motion
This is the core technique. Take a thin strand of hair—about a quarter to a half-inch wide—from the outer edge of the right section. Cross this small piece over the top of the right section and join it with the left section. Now, repeat on the other side: take a thin strand from the outer edge of the left section, cross it over the top of the left section, and merge it with the right section. The key is this alternating pattern: always taking from the outside and crossing over to the opposite side.
Step 3: Repeat and Refine
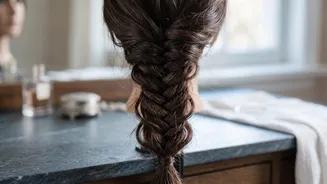
Continue this weaving process, alternating from right to left, all the way down the length of your hair. Try to keep the strands you cross over relatively consistent in size. Using smaller, thinner strands will result in a more intricate and detailed fishtail pattern, while larger sections create a chunkier look. Maintain a gentle, consistent tension as you go to keep the braid from becoming lumpy or loose in spots. Don't worry if it's not perfect on the first try; your hands will quickly learn the rhythm.
Step 4: Secure and 'Pancake' for Volume
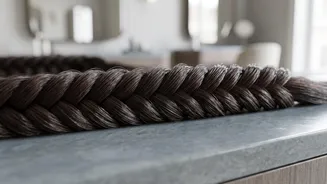
Once you've braided down to the ends, secure the braid with a hair elastic. If you started with a ponytail at the nape of your neck, you can now carefully cut and remove the top elastic. For a fuller, more romantic look, it's time to 'pancake' the braid. Gently pull on the outer edges of the woven sections, starting from the top and working your way down. This loosens the braid and creates the illusion of more volume and texture, turning a simple braid into a statement style.
Common Mistakes to Avoid
A few common errors can derail a fishtail braid. Taking uneven sections is a primary culprit for a lopsided look. Another is losing tension, which causes the braid to loosen and fall apart. Try to pinch the braid where the strands cross to hold it in place while you grab the next piece. If you have layered hair, shorter pieces may pop out. A small amount of styling cream or a few strategically placed bobby pins can easily tuck them back in. Finally, don't rush. Taking your time to master the hand positions is key.
Fun Fishtail Variations to Try
Once you've mastered the classic fishtail, the possibilities are endless. Try a French fishtail by incorporating new hair from the sides as you braid down from the crown, similar to a French braid. For an edgier look, create a Dutch fishtail by crossing the strands underneath each other instead of over. You can also do a fishtail crown braid that wraps around your head, create two pigtail fishtails, or incorporate a small fishtail as an accent in a half-up style.