







Understanding the Invisible Ingredient: Humidity
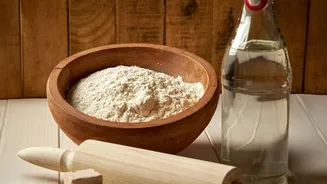
Baking is a science, and during the monsoon, an uninvited guest crashes the party: humidity. This excess moisture in the air is the primary reason your tried-and-true recipes suddenly fail. Dry ingredients like flour, sugar, and even salt are 'hygroscopic',
which means they absorb moisture directly from the atmosphere. So, on a humid day, your cup of flour already contains more water than it does on a dry day. This seemingly small change throws off the delicate balance of your recipe, resulting in batters that are too wet and doughs that are sticky and difficult to handle. This extra moisture can lead to cakes with a dense, gummy texture, cookies that spread too much, and bread that struggles to develop a good structure.
The Pre-Bake Battle: Storing Ingredients Correctly
Since the problem begins with moisture-laden ingredients, your first line of defence is proper storage. This is the most crucial step in monsoon baking. Ditch the plastic bags and invest in airtight containers, preferably made of glass or steel, which create a superior barrier against moisture. For flour, consider adding a few dried bay leaves or cloves to the container; they act as natural moisture absorbers and pest deterrents. Sugar and salt, which are prone to clumping, can be kept dry by adding a few grains of raw rice to the jar to soak up any intrusive dampness. It’s also wise to buy smaller batches of flour during the rainy season. An open pack of flour has more time to absorb humidity, so purchasing what you’ll use in a few weeks, rather than a few months, ensures your key ingredient is in its best condition.
Prepping Your Kitchen for Success
Your ingredients are safe, but your kitchen is still a humid zone. Taking a few moments to control your environment can make a world of difference. If you have an air conditioner, running it for about 30 minutes before you start baking can significantly lower the humidity in the room. A dehumidifier is another excellent tool for the serious baker. If those aren't options, choose the coolest, driest time of day for your baking adventures, often early in the morning or late at night. Always ensure your work surfaces and utensils are completely dry. Even a few drops of water on a spatula or in a mixing bowl can contribute to an overly wet batter. The same goes for your hands; work with dry hands to avoid making sticky dough even harder to manage.
Adjusting the Recipe as You Go
Even with perfect prep, the ambient humidity will still have an effect. This is where you might need to make small, intuitive adjustments to your recipe. Think of it less as changing the recipe and more as responding to the conditions of the day. A common strategy is to slightly reduce the amount of liquid (like milk or water) in your recipe by about 10-20%. For doughs that feel too sticky, instead of adding a lot of extra flour at once, add it one tablespoon at a time until the dough is manageable. For yeast-based breads, be aware that the warm, humid climate will make your dough rise much faster. Keep a close eye on it to prevent over-proofing, which can cause the dough to collapse in the oven. Sometimes, you may even need to use your refrigerator to slow down the fermentation process, a technique that also develops better flavour.
The Final Hurdle: Cooling and Storing
You’ve navigated the challenges and your bake is out of the oven, looking perfect. Don't let your hard work go to waste in the final step. Letting your baked goods cool completely on a wire rack is non-negotiable. Placing a hot cake or cookie on a flat surface traps steam, which turns into condensation and results in a soggy bottom. The wire rack allows air to circulate all around, ensuring a crisp finish. Once completely cool—and not a moment sooner—store your creations in an airtight container. For items you want to keep extra crispy, like cookies or biscotti, you can place a small, food-safe silica gel packet inside the container to absorb any lingering moisture.