







The Batter's Balancing Act
The journey to a perfect chilla begins long before it hits the heat. The single most important factor is the batter's consistency. A batter that is too thick will not spread evenly and will cook into a dense, heavy pancake that's prone to cracking under
its own weight. On the other hand, a batter that is too thin and watery will lack the structure to hold together, spreading too far and creating a chilla that is too fragile to flip. The ideal consistency is smooth with a pouring quality, similar to that of a dosa batter—not too thick, not too runny. To achieve this, add water to your besan (gram flour) gradually, whisking continuously to eliminate any lumps. A lumpy batter is a promise of an unevenly cooked chilla that will break at its weak points.
Rest, Reinforce, and Refine
Once you've achieved that smooth, flowing consistency, another professional tip is to let the batter rest for at least 15-20 minutes. This allows the besan to fully absorb the water, resulting in a more cohesive and tender pancake. If your chillas are still prone to breaking, consider adding a binding agent. Just one tablespoon of sooji (semolina) or rice flour can work wonders. These ingredients provide extra structure and also contribute to a crispier texture. Furthermore, be mindful of your add-ins. While finely chopped onions, tomatoes, and coriander add wonderful flavour and nutrition, overloading the batter with too many vegetables, or using coarsely chopped pieces, can compromise its integrity and cause it to fall apart during cooking. Keep your vegetable additions finely chopped and in proportion to the amount of batter.
Temperature Is Everything
This is where many home cooks falter, and it's often why the pan gets the blame. The key is to use a tawa or skillet heated over a consistent medium flame. If the pan is too hot, the batter will set instantly upon contact, making it impossible to spread evenly. This can also cause the outside to burn before the inside is cooked, leading to a raw-tasting, fragile chilla. Conversely, if the pan isn't hot enough, the batter won't start cooking immediately and may stick. How do you find the sweet spot? Heat your pan for a few minutes and test it by sprinkling a few drops of water. If they sizzle and evaporate right away, your pan is ready. Always grease the pan lightly and evenly before pouring the batter.
The Art of the Spread and Flip
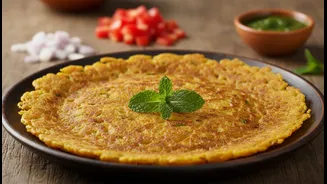
How you pour and spread the batter is just as critical as its preparation. Once the pan is perfectly heated, pour a ladleful of batter into the centre. Using the back of the ladle, gently spread it in a circular motion to form an even round shape. Be gentle; aggressive spreading can tear the delicate structure before it even has a chance to set. Cook until the top surface begins to look dry and the edges start to lift away from the pan. This is your cue that the chilla has formed a stable crust and is ready to be flipped. Rushing the flip is a common mistake. Slide a thin spatula completely underneath the chilla before lifting and turning it over in one confident motion. Cook the other side for another minute or two until you see golden-brown spots, and your perfect chilla is ready to be served.