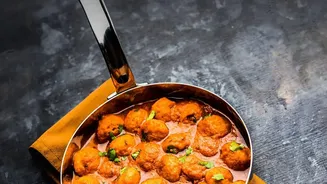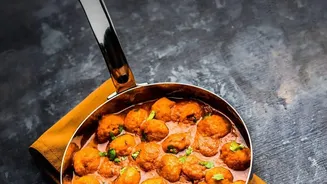

The Foundation: Mastering Your Kofta Mixture
The secret to a stable kofta begins with its core ingredients: paneer and potato. Moisture is the number one enemy. Whether you use homemade or store-bought paneer, make sure it is as dry as possible. One effective method is to wrap the paneer in a muslin
cloth and press it under a heavy object for about 30 minutes. For the potatoes, boil them until just tender, then let them cool completely and steam dry before grating. Hot or warm potatoes will be sticky and retain too much water. The ideal ratio is typically equal parts paneer and potato, as too much potato can make the koftas absorb excess gravy and fall apart. Knead the grated paneer and potato together for a few minutes until you have a smooth, pliable dough. This initial step is crucial for texture and integrity.
The Binding Agents: Cornflour and Khoya
Even with a perfect paneer-potato base, a binding agent is essential. While many recipes use all-purpose flour (maida), cornflour (cornstarch) is often a superior choice. It creates a light, crisp exterior without making the kofta dense and heavy. Start by adding a couple of teaspoons of cornflour to your mixture and mix well. If the mixture still feels too wet or doesn't hold its shape when you try to form a small ball, you can add a little more. For an extra layer of richness and binding, consider adding a small amount of khoya (milk solids). This not only enhances the flavour, making it more like the restaurant versions you love, but also helps in creating a cohesive, smooth dough. For a gluten-free option, gram flour (besan) or rice flour can also be used.
Shaping and Frying to Perfection
Once your mixture is ready, it's time to shape the koftas. Lightly grease your palms with a little oil to prevent sticking. Roll the mixture into small, uniform balls, ensuring there are no cracks on the surface, as these are weak points that can cause the kofta to break during frying. Some chefs recommend stuffing the centre with a few raisins or chopped nuts for a traditional touch. Before you start frying, it's a good practice to chill the shaped koftas for about 15-20 minutes. This helps them firm up. Heat oil in a deep pan over a medium flame. The temperature is critical; if the oil is too hot, the koftas will brown too quickly on the outside while remaining raw inside. If it's not hot enough, they will absorb too much oil and become greasy and prone to breaking. Test the oil by dropping a tiny piece of the mixture into it; if it sizzles and rises to the surface steadily, the oil is ready. Fry the koftas in small batches until they are golden brown and crisp, then remove them with a slotted spoon.
The Gentle Gravy
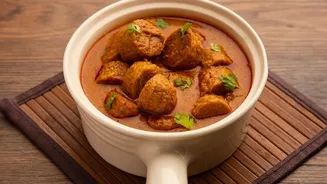
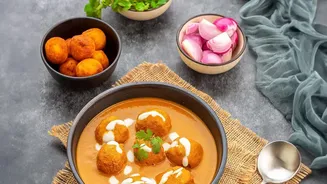
The gravy isn't just a sauce; it's the environment your koftas will live in. A gravy that is too thin or boiling aggressively will destroy even the most perfectly constructed kofta. A classic malai kofta gravy is made from a smooth purée of onions, tomatoes, ginger, garlic, and cashews, which give it that signature creamy texture. After blending, strain the purée to ensure a silky-smooth consistency, free of any fibrous bits. Cook this base with your chosen spices until it thickens and the oil begins to separate. The gravy should be thick enough to coat the back of a spoon. This viscosity provides a gentle cushion for the delicate koftas.
The Final, Crucial Step: Bringing It All Together
This is where many home cooks make their final mistake. Never, ever add koftas to a boiling gravy. The vigorous bubbling action is almost guaranteed to break them apart. Instead, turn off the heat and let the gravy cool to a warm temperature. The koftas should also be slightly cooled. Gently place the koftas into the warm gravy just before you are ready to serve. Avoid stirring them with a spoon; if you need to mix, gently swirl the pan. For best results and to maintain some of the kofta's texture, some people prefer to place the koftas in a serving dish and pour the warm gravy over them right at the table. This ensures they are heated through but don't become overly soft or waterlogged.