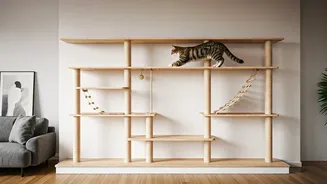


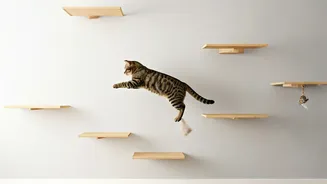


Why Go Vertical?
Before you start drilling, it helps to understand why cats love high places. In the wild, vertical spaces offer safety from predators and a superior vantage point for hunting. For our domesticated companions, this instinct remains strong. A wall-mounted
bridge or shelf system, often called a 'cat superhighway', provides an elevated, secure territory that is exclusively theirs. This reduces stress, especially in multi-pet households, by giving them a safe retreat. It also encourages exercise, climbing, and jumping, preventing boredom and promoting physical health. For you, it's a space-saving way to enrich your cat's environment without cluttering your floor.
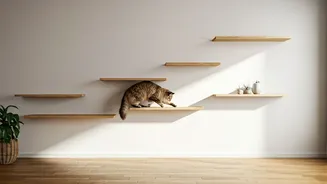
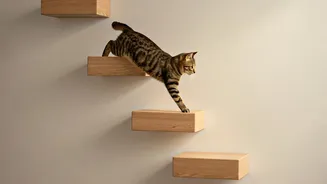
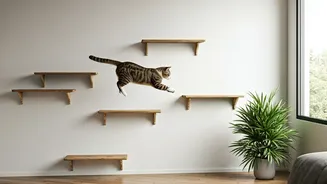
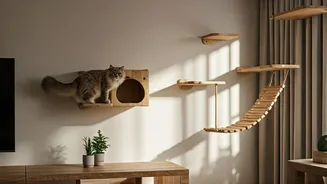
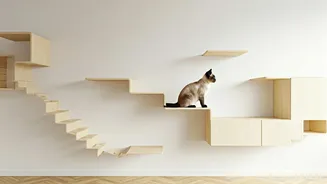
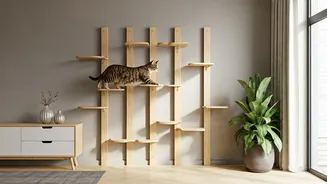
Plan Your Feline Superhighway
The best cat bridges feel like an integrated part of your home. Start by observing your cat. Where do they like to nap? Which windows do they gaze out of? Try to connect these high-interest areas. Sketch a simple layout on paper. Will it be a single bridge between two perches or a complex network of shelves and walkways? The most critical part of planning is locating the wall studs. Cat furniture must be anchored securely into these wooden beams behind the drywall; plasterboard alone cannot support a cat's weight, especially a leaping one. A simple electronic stud finder is an essential tool for this project.
The DIY Shopping List
You don’t need a professional workshop to build a simple cat bridge. Most materials are available at your local hardware store. For the perches or platforms, solid wood planks (like pine) are a sturdy and affordable choice. You’ll need strong metal L-brackets to mount them to the wall studs. For the bridge itself, a common design involves two parallel ropes with wooden slats attached. Look for durable, natural fibre ropes like sisal or jute. For the slats, you can use small pieces of 1x2 or 1x3 inch lumber. Finally, consider comfort and grip. Non-toxic wood glue, sandpaper for smooth edges, and a remnant of low-pile carpet or sisal fabric to wrap the platforms can make the setup more inviting and safer for your cat's paws.
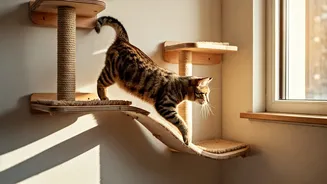
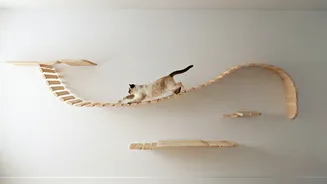
The Basic Bridge Build
For a simple rope bridge, start by securely mounting your two end platforms to the wall studs. Once they are stable, drill holes on the inner edge of each platform for your ropes to pass through. Cut your wooden slats to your desired width—usually around 6-8 inches. Drill two holes in each slat, ensuring the spacing matches the holes on your platforms. Thread your first rope through one platform, then through all the slats, and finally through the other platform, knotting it securely on the outside. Repeat with the second rope. The key is to keep the slats evenly spaced. You can tie small knots in the rope between each slat or use a dab of wood glue to keep them from sliding.
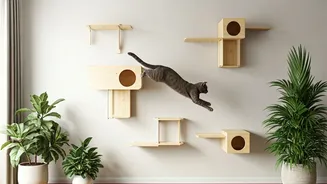
Inspiration on Social Media
This is where the headline comes to life. The real 'manuals' are the visual guides shared by a vibrant community of pet lovers online. On Pinterest, search for 'DIY cat shelves' or 'cat wall' to find thousands of visual ideas, from minimalist floating shelves to elaborate, room-spanning structures. Instagram is a treasure trove of inspiration; follow hashtags like #catification, #catwall, and #DIYcat to see what other creative owners are building. Many will share progress photos, list the materials they used, and answer questions in the comments. YouTube is the ultimate resource for full-length tutorials, where you can watch builders go through the entire process, from finding studs to watching their cat take its first tentative steps across the new bridge.
Safety First, Always
A DIY project is only successful if it's safe. Always anchor shelves and platforms into wall studs. After installation, test the sturdiness of every component by applying significant pressure—more than your cat's weight. Ensure there are no exposed screw heads or sharp edges where your cat could get hurt. Sand all wood thoroughly. If you're adding carpet or fabric, secure it with non-toxic glue or staples that are fully embedded. Finally, make sure the spacing of bridge slats is close enough that your cat can't get a leg caught between them. A good rule of thumb is a gap of no more than 1-1.5 inches.