

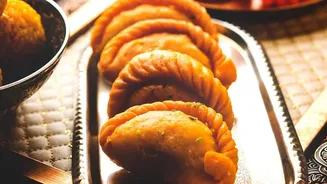
A Sweet Offering for Krishna
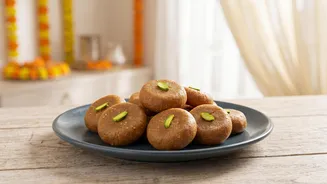
Mathura Peda is more than just a dessert; it's a sacred offering, or 'prasad', deeply connected to Lord Krishna. Legend says the tradition began in Mathura, and the sweet is considered one of Krishna's favourites, making it an essential part of Janmashtami
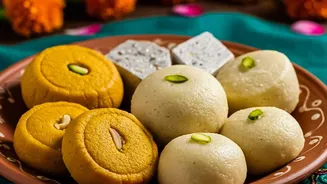
celebrations. Unlike other pedas, the Mathura variety has a distinctly rich, brownish colour and a slightly granular texture, which comes from slowly roasting milk solids, or khoya. While the traditional process can take hours, this recipe uses store-bought khoya to give you that authentic taste without the exhaustive effort, making it perfect for modern kitchens.
Gather Your Ingredients
This recipe relies on a few key ingredients to achieve its signature flavour and texture. Using good quality, fresh ingredients will make a noticeable difference in the final result. Here is what you will need: Unsweetened Khoya (Mawa): 250 grams, grated. This is the heart of the peda. You can find it in the refrigerated or freezer section of most Indian grocery stores. Ghee: 2 tablespoons. Ghee adds richness and prevents the khoya from sticking. Sugar: 1/2 cup, powdered (or 'bura' for a more traditional taste). You will also need extra granulated or turbinado sugar for coating the pedas. Milk: 2-3 tablespoons, as needed. This helps to adjust the consistency. Cardamom Powder: 1/2 teaspoon, for a fragrant aroma. Nutmeg Powder: A pinch (optional), for added warmth.
Step 1: Roasting the Khoya
The secret to the perfect Mathura peda is in the roasting. This step develops the characteristic brown colour and nutty flavour. Start by placing a heavy-bottomed, non-stick pan on low heat. Add the grated khoya and begin to roast it, stirring continuously with a spatula. After about 5 minutes, the khoya will start to melt and change colour. Add the ghee and continue to stir. It is crucial to keep the heat low to prevent the khoya from burning. Keep scraping the sides and bottom of the pan. Continue this process for about 15-20 minutes until the khoya turns a deep, golden-brown and releases a fragrant aroma. The mixture will become crumbly.
Step 2: Cooling and Grinding
Once the khoya is well-roasted, turn off the heat and transfer it to a separate plate or bowl to cool down slightly. It should be cool enough to handle but still warm. If the roasted khoya is lumpy, you can transfer it to a blender and pulse it a few times to achieve a smoother, more even, granular texture. This step ensures your pedas will be uniform and melt in your mouth. If the mixture seems too dry after blending, you can add a tablespoon of warm milk and pulse again.
Step 3: Mixing and Shaping
Transfer the ground khoya mixture into a large bowl. Add the powdered sugar, cardamom powder, and the optional nutmeg powder. Now, use your hands to mix everything together thoroughly. The warmth from the khoya will help the sugar meld into the mixture. If the mixture feels too dry to bind, add a tablespoon of milk at a time until it comes together into a soft, pliable dough. Be careful not to add too much milk, as it can make the pedas sticky. Once the dough is ready, take small, lemon-sized portions and roll them into smooth balls between your palms. Gently flatten each ball to create the classic peda shape. They don't need to be perfectly uniform; a rustic shape is part of their charm.
Step 4: The Final Touch
The final step is to coat the pedas in sugar, which gives them their signature look. Spread some granulated or turbinado sugar on a plate. While the pedas are still slightly warm, gently roll each one in the sugar until it is evenly coated. Shake off any excess. The warmth helps the sugar crystals adhere to the surface. Let the pedas sit at room temperature for at least an hour to firm up before serving. This allows the flavours to deepen and the texture to set perfectly. You can store your homemade Mathura pedas in an airtight container in the refrigerator for up to a week.