
Looking to refresh a blank wall without breaking the bank? Origami wall art offers a stunning, affordable, and deeply personal way to decorate your space. The process is meditative, and the result is a unique, handmade geometric masterpiece.
Gathering Your Supplies
Before you
begin folding, it’s best to gather all your materials. This project is wonderfully simple and doesn't require many specialised tools. You will need paper, a cutting tool if your paper isn't pre-cut, and an adhesive. For paper, lightweight origami paper is easiest to fold, but you can also use printer paper, scrapbook paper, or colourful cardstock up to 160 gsm for a sturdier finish. Heavier paper results in a more rigid final piece but can be harder to fold precisely. For adhesives, a simple glue stick or thin double-sided tape works well for lightweight paper and helps prevent warping. For heavier cardstock, a quality liquid craft glue like PVA glue is a reliable choice. You may also want a ruler and pencil for measurements and a backing board, like foam board or stiff cardboard, to mount your design.
Choosing Your Origami Shape
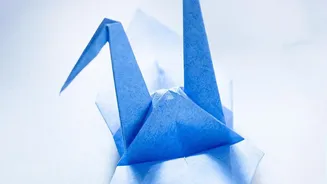
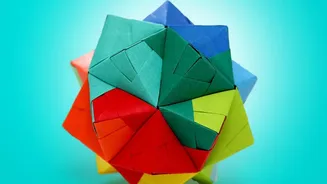
The magic of this project lies in repetition. By folding multiple identical units, you can create complex and beautiful patterns. This is the core principle of modular origami. For beginners, it's best to start with a simple, effective shape. Classic choices like the origami crane or butterfly are beautiful and recognizable. However, for creating interlocking patterns, a 'Sonobe unit' is a fantastic starting point. This simple module is designed to connect with others, allowing you to build everything from cubes to intricate geometric spheres. Other great options include basic pyramids, simple flowers, or geometric shapes like hexagons. The key is to choose one design and master it. Precision is important; small inaccuracies in each unit can become noticeable when you assemble the final piece.
The Meditative Art of Folding
Once you've chosen your shape, the folding begins. This is the heart of the project. Many people find the repetitive process of folding dozens of identical units to be a calming, almost meditative experience. You will need to create many pieces—sometimes 30, 60, or even over 100, depending on the scale of your artwork. You can find thousands of free step-by-step tutorials online, with clear diagrams and videos to guide you through any shape you choose. Focus on making each fold as crisp and accurate as possible. Consistent, clean folds will ensure your modules fit together neatly, creating a professional-looking final product. Put on some music, settle in, and enjoy the simple, satisfying process of turning flat squares of paper into three-dimensional building blocks.
Designing Your Wall Pattern
With a pile of folded units ready, it's time for the most creative step: designing your pattern. Lay your pieces on the floor or a large table to experiment with arrangements before committing. You could create a simple grid, a radiating starburst, or a cascading wave. Playing with colour is also crucial. An ombré or gradient effect, shifting from one colour to another, can create a sense of movement. You could also use a tight cluster of colours to form a focal point or arrange colours randomly for a confetti-like effect. If you've used a modular unit like the Sonobe, you can connect the pieces to build threendimensional pyramids and shapes that extend from the wall, adding depth and shadow to your artwork. There is no wrong answer here; the goal is to create a composition that you find beautiful.
Mounting Your Masterpiece
The final step is to bring your art to the wall. You have two main options: attaching the pieces to a backing board or fixing them directly onto the wall. A backing board, such as foam board or thick cardboard, allows you to arrange and glue your design permanently and then hang the entire piece like a traditional picture frame. This is often easier and less permanent than applying pieces directly to your wall. Use your chosen craft glue or double sided tape to secure each piece to the board. If you prefer a more free form look, you can attach the shapes directly to the wall using a gentle adhesive like wall safe mounting tape or putty. This method allows your pattern to float on the wall, creating a lighter, more integrated feel.