




Cultivating Your Wild Yeast Starter
The heart of any great sourdough is its starter, a living culture of wild yeast and bacteria captured from the environment. Until about 160 years ago, all leavened bread was made this way. Creating your own is simpler than you might think. All you need
is flour and water. To begin, mix equal parts whole wheat flour and lukewarm, non-chlorinated water in a clean glass jar until no dry bits remain. Cover it loosely—a tea towel secured with a rubber band works well—and leave it at room temperature for 24 to 48 hours. During this time, the mixture will begin to capture the natural yeasts present in the flour and the air. Once you see bubbles, you'll begin a routine of daily 'feedings.' Discard about 80% of the mixture and replenish the remainder with fresh flour and water. After five to seven days of consistent feeding, your starter should be active, bubbly, and emitting a pleasantly sour, yeasty aroma, ready for baking.
Mixing and First Fermentation
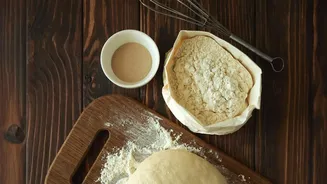
With your active starter ready, it's time to mix your dough. In a large bowl, combine a portion of your bubbly starter with warm water and mix until the starter dissolves. Then, add your wheat flour and salt. Mix everything with your hands or a spatula until a shaggy dough forms, ensuring all the flour is hydrated. Cover the bowl and let it rest for about 30-60 minutes. This initial rest period, known as the autolyse, allows the flour to absorb the water, making the dough easier to work with. Following this rest, you'll perform a series of 'stretch and folds' every 30-60 minutes over the next few hours. This process develops the gluten structure, which gives the bread its signature chewy texture, without the need for intensive kneading. You'll notice the dough becoming smoother and stronger after each set of folds. This entire stage is called bulk fermentation, where the yeast gets to work, causing the dough to rise and develop its characteristic flavor.
Shaping the Loaf and Final Proof
Once the dough has risen significantly and feels full of air, it's time to shape it. Gently release the dough onto a lightly floured surface. The goal is to create surface tension, which will help the loaf hold its shape and rise upwards in the oven. Gently stretch the dough into a rough rectangle, then fold the sides in, and roll it into a tight log or round boule. Place the shaped loaf, seam-side up, into a proofing basket (banneton) or a bowl lined with a floured tea towel. This final rise, or proof, is a crucial step. You can let it proof at room temperature for a couple of hours for a quicker bake, or place it in the refrigerator for a long, cold fermentation (anywhere from 12 to 24 hours). The cold proof develops a more complex, tangier flavor and makes the dough easier to handle and score before baking.
Baking for a Perfect Crust
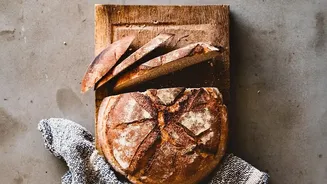
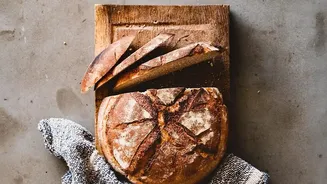
For a bakery-quality crust at home, the secret is steam. The easiest way to achieve this is by using a Dutch oven. Place your Dutch oven in the cold oven and preheat both to a high temperature, around 230-250°C (450-500°F), for at least 45 minutes. Once preheated, carefully remove the hot pot from the oven. Take your cold dough directly from the fridge, flip it onto a piece of parchment paper, and score the top with a sharp blade or razor. This scoring allows steam to escape and controls where the bread expands. Lower your loaf into the hot Dutch oven, cover it with the lid, and bake for about 20-25 minutes. The trapped steam keeps the crust soft initially, allowing for maximum 'oven spring' or rise. Then, remove the lid and continue baking for another 15-20 minutes, or until the crust is a deep golden brown and the loaf sounds hollow when tapped.