


The Magic of Instant Chilla
Moong dal chilla is a beloved Indian breakfast and snack, celebrated for being both delicious and incredibly nutritious. Made from split yellow lentils, these savoury crepes are packed with protein and fibre, making them a healthy and filling meal. Traditionally,
the batter requires several hours of soaking and sometimes fermentation to develop flavour and texture. However, the beauty of the instant method is its simplicity and speed. By skipping fermentation, you can satisfy your chilla cravings in under an hour, making it a perfect option for a quick weeknight dinner or a wholesome weekend breakfast. The secret lies in a few key techniques that ensure a crispy exterior and a soft, fluffy interior, rivaling anything you would find on the street.
Mastering the No-Ferment Batter
The foundation of a great chilla is the batter, and getting the consistency right is crucial. Start by soaking one cup of split yellow moong dal (dhuli moong) in water for at least one to two hours; if you are short on time, soaking in warm water for 30 minutes will also work. Once soaked, drain the dal and transfer it to a blender. Add flavour-makers like a small piece of ginger, one or two green chillies, and a pinch of asafoetida (hing). Blend with a minimal amount of water—start with about half a cup—until you have a smooth, pourable batter. It should be thick enough to coat a spoon but not so thick that it is difficult to spread. A batter that is too watery will lead to soft, flimsy chillas, while one that is too thick will be dense and heavy.
The Secret to a Crispy Finish
To achieve that signature street-style crispiness without fermentation, a simple addition to the batter makes all the difference. Add one to two tablespoons of rice flour or fine semolina (suji/rava) to your ground batter. These ingredients help absorb excess moisture and create a wonderfully crunchy texture when cooked. Once you have mixed in the rice flour or semolina, add salt to taste, a pinch of turmeric for colour, and finely chopped vegetables like onions, tomatoes, or fresh coriander leaves. Let the batter rest for about 10 minutes; this allows the semolina or rice flour to fully incorporate and thicken the batter slightly.
Cooking to Golden Perfection
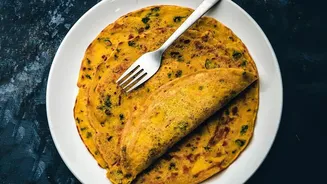
The cooking technique is just as important as the batter. Heat a non-stick tawa or a well-seasoned cast-iron pan over medium-high heat. The pan must be properly hot before you begin; a good test is to sprinkle a few drops of water, which should sizzle and evaporate immediately. Lightly grease the pan with oil or ghee. Pour a ladleful of batter onto the centre of the pan and, using the back of the ladle, spread it in a circular motion to form a thin, even pancake. Drizzle a little oil around the edges, which will help it become crisp. Let the chilla cook for two to three minutes, or until the top surface looks dry and the edges start to lift from the pan. Do not be in a hurry to flip it. Once the underside is golden brown, flip it and cook for another minute or two. Press down gently with a spatula to ensure it cooks evenly.
Filling and Serving Suggestions
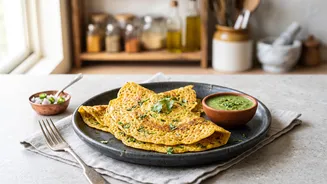
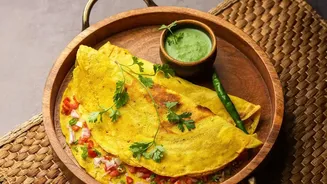
While a plain moong dal chilla is delicious on its own, adding a filling elevates it to another level. A popular street-style choice is a simple stuffing of crumbled paneer mixed with finely chopped onions, tomatoes, and a sprinkle of chaat masala. You can add the filling to one half of the chilla just before folding it over on the tawa. Other options include grated cheese, mixed vegetables, or even spiced tofu. Serve your hot, crispy chillas immediately with a side of tangy green coriander chutney and a sweet tamarind chutney for the complete street-food experience. They also pair wonderfully with a simple cup of tea for a satisfying evening snack.