

The Magic of a Wild Yeast Starter
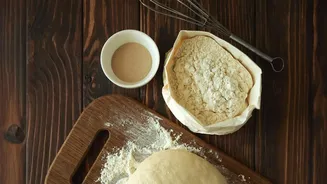
At its heart, a sourdough starter is a living culture. It’s a simple mixture of flour and water that captures wild yeast and beneficial bacteria naturally present in your environment and on the flour itself. Instead of using commercial yeast from a packet,
you cultivate this natural yeast to leaven your bread. This fermentation process is what gives sourdough its characteristic tangy flavour, chewy texture, and rustic crust. Nurturing a starter is a rewarding journey that connects you to an ancient way of baking, and the warm, humid climate in many parts of India can actually be ideal for getting it started.
Choosing Your Indian Flour
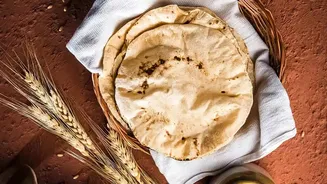
You don't need expensive, imported bread flour to begin. The flours in your own kitchen are perfectly capable. The two most common choices are atta (whole wheat flour) and maida (all-purpose flour). Atta is fantastic for starting your culture because the bran and germ contain more of the natural microorganisms and nutrients that yeast loves to feed on. This often means an atta-based starter becomes active more quickly. Maida creates a lighter texture. Many bakers find success with a 50:50 blend of atta and maida, which offers both the nutritional boost of whole wheat and the smoother consistency of refined flour. You can use just one or the other, but a blend is a great, reliable starting point.
Your Day-by-Day Starter Guide
Patience is key. Your starter will go through several phases over about a week. Use a clean glass jar and a kitchen scale for accuracy. Day 1: In your jar, mix 50g of your chosen flour (or blend) with 50g of room-temperature, filtered water. Stir until no dry flour remains. The consistency should be like a thick batter. Cover loosely and leave it in a warm spot in your kitchen. Day 2: You might see a few tiny bubbles. Not much happens today, and that's okay. Just give it a stir and let it be. Day 3: It's time for the first feeding. You may notice a slightly sour or fruity smell. Discard about half of the mixture. To the remaining starter, add another 50g of flour and 50g of water. Mix well, cover, and wait. Day 4-7: Now, you'll feed your starter every 12-24 hours. In warmer Indian climates, a 12-hour schedule is often best to prevent the yeast from running out of food. Each time, discard about half of the starter before adding 50g flour and 50g water. You should see it becoming more bubbly and predictable with each passing day. Sometimes a starter seems to go dormant around day 3 or 4; this is normal as the microbial culture stabilises. Just keep feeding it.
Is It Ready? Signs of an Active Starter
After about a week of consistent feeding, your starter is ready when it shows three key signs. First, it will be very bubbly and active, with a sponge-like texture. Second, it will reliably double or even triple in volume within 4 to 8 hours after a feeding. You can track this by placing a rubber band on the jar at the level of the starter right after you feed it. Third, it will have a pleasant, tangy aroma, not a foul or overly sharp smell. A popular method to check for readiness is the 'float test': drop a small spoonful of your active starter into a glass of water. If it floats, it's full of trapped gas and ready to leaven bread.
Maintenance and Long-Term Care
Once your starter is mature and active, you don’t have to feed it as intensely unless you bake daily. If you bake 1-2 times a week, the best place for your starter is the refrigerator. Feed it, let it sit at room temperature for an hour or two, and then pop it in the fridge. This slows down fermentation, and you'll only need to feed it once a week to keep it healthy. When you want to bake, take it out, give it a couple of feedings at room temperature over 12-24 hours to wake it up, and it will be bubbly and ready for your dough.
Troubleshooting Common Issues
If you see a dark liquid on top, don't worry. This is called 'hooch' and is simply a sign that your starter is hungry. Just stir it back in and feed your starter. If your starter seems sluggish, try moving it to a warmer spot or giving it a feeding with whole wheat or rye flour for an extra nutrient boost. The only time you need to throw it out and start over is if you see pink or orange streaks or fuzzy mould, which indicates the wrong kind of bacteria has taken over.