


Reading the Signs: When to Repot
Before you get your hands dirty, it’s important to know if your plant actually needs a new home. The most obvious sign is roots growing out of the drainage holes. Other clues include water running straight through the pot without absorbing, or the plant drying
out extremely quickly, sometimes within a day or two of watering. You might also notice that new leaves are smaller than previous ones or that growth has stalled altogether, even with regular care. If you gently slide the plant out of its pot and see a dense mass of roots circling the container with very little soil visible, it's definitely time for an upgrade.
Gather Your Tools and New Pot
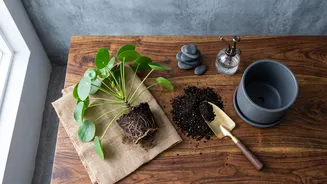
Preparation is key to a smooth process. You’ll need a new pot, fresh potting mix, and your cleaning supplies. Choose a new pot that is only one to two inches wider in diameter than the current one. Moving to a pot that's too large can lead to waterlogged soil and root rot because the excess soil holds moisture the roots can't reach. Ensure the new pot has a drainage hole; this is non-negotiable for a healthy plant. As for soil, use a quality potting mix appropriate for your specific plant type. Fresh soil provides the nutrients and structure your plant needs to recover and grow.
The Importance of Clean Tools
Just like surgical instruments, your gardening tools need to be sterilized to prevent the spread of bacteria, fungi, and other pathogens from one plant to another. This is a simple but critical step. Before disinfecting, make sure to physically clean your tools, like a small trowel or pruning snips, with soap and water to remove any dirt and debris. For sterilization, you have a few options. A common method is to soak the tools for 10 to 30 minutes in a solution of one part household bleach to nine parts water. Afterward, rinse them thoroughly with clean water to prevent corrosion and let them air-dry. Alternatively, you can wipe or dip your tools in a solution of at least 70% isopropyl alcohol, which is immediately effective and doesn't require rinsing.
Removing the Plant and Protecting Roots
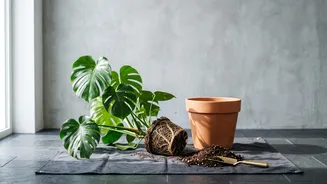
This is where a gentle touch is crucial. To minimize stress, water your plant a day before you plan to repot it; this helps the root ball hold together. To remove the plant, turn the pot on its side, support the base of the stems with one hand, and gently tap or squeeze the pot to loosen it. Avoid pulling the plant out by its stem. If it's stuck, run a clean butter knife or small trowel around the inside edge of the pot to free the root ball. Once out, inspect the roots. If they are tightly circling in a dense mass, gently tease the bottom and side roots apart with your fingers to encourage them to grow into the new soil. Don't be afraid to make a few vertical cuts with a clean knife if the root ball is extremely compacted, but avoid excessive damage.
The Final Move: Settling Into the New Pot
With your plant prepped, it’s time for its new home. Add a layer of fresh potting mix to the bottom of the new pot. Place the plant in the center, ensuring the top of the root ball sits about an inch below the rim of the pot to leave room for watering. Fill in the space around the root ball with fresh soil, gently patting it down to eliminate large air pockets without compacting it too much. Be careful not to add new soil on top of the original root ball, as this can lead to stem rot. The plant should be at the same soil level it was in its old pot.
Aftercare and Recovery
Repotting is like major surgery for a plant, so expect a brief recovery period sometimes called 'transplant shock'. After potting, give your plant a thorough watering until it runs from the drainage hole, which helps settle the soil. Place the plant back in its usual spot, but be mindful of watering. The new, larger volume of soil will retain moisture differently, so check the soil before watering again. Let the top inch or two dry out. Hold off on fertilizing for at least a few weeks to a month. The fresh potting mix has enough nutrients, and you should wait for signs of new growth before feeding it again. This gives the roots time to heal and adjust without being burned by excess fertilizer.