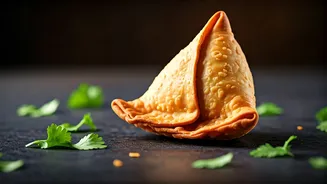


Why Homemade Usually Falls Short
Let’s be honest. For many of us, the dream of a perfect homemade samosa dies a soggy, oily death. We follow recipes meticulously, but the results are often a pale comparison to the ones from our favourite local halwai. The crust might be too thick, too soft,
or pockmarked with bubbles like a puri. The filling might be bland or mushy. The culprit isn’t your skill; it’s that most recipes skip over the 'why' behind the crucial steps. Street vendors make thousands of samosas a day, and their technique is perfected through repetition. But we can replicate and even improve upon it by understanding the science behind the perfect crunch and flavour.
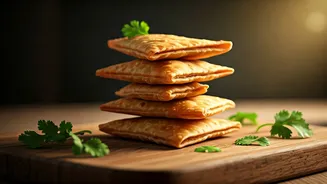
The Soul of the Samosa: The Dough
The single biggest differentiator between a mediocre samosa and a great one is the pastry. The goal is a ‘khasta’ or flaky, short crust, not a bready or elastic one. The secret lies in one word: ‘moyan’—the fat added to the flour. For every cup of maida (all-purpose flour), you need a generous 3-4 tablespoons of ghee or oil. The trick is to rub the fat into the flour until the mixture resembles breadcrumbs. When you clench a fistful, it should hold its shape. This process coats the flour particles, preventing gluten from developing when you add water. Use cold water and add it sparingly, kneading just enough to form a stiff, non-sticky dough. An elastic, soft dough will puff up and bubble during frying. Let this stiff dough rest, covered, for at least 30 minutes. This allows it to hydrate evenly without becoming elastic.
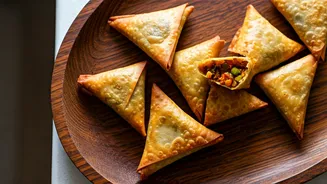
A Filling that Stands on Its Own
A great filling is a balance of textures and tastes. Start with the right potatoes. Boil them until just tender—if they get too mushy, your filling will be pasty. It’s better to slightly under-boil them, peel, and then crumble them by hand into uneven chunks. This texture is far superior to a uniform mash. For the flavour, toast your whole spices like cumin and coriander seeds before coarsely crushing them. This releases their essential oils. Sauté your aromatics—ginger, green chillies—and then add your spices, peas, and finally the crumbled potatoes. Finish with amchur (dry mango powder) for tang and a sprinkle of garam masala at the end to preserve its aroma. The filling should be flavourful enough to be delicious on its own.
The Fry: Low, Slow, and Golden
This is where most home cooks go wrong. We are used to frying things in hot oil, but for samosas, that is a recipe for disaster. Hot oil will cook the outside instantly, causing the pastry to bubble and brown before the inside layers are cooked, resulting in a raw-dough taste and a soft crust. The professional secret is to start the fry in oil that is just warm, not hot (around 120-130°C). When you slide a samosa in, it should sizzle very gently. Frying on this low-medium heat for 10-15 minutes cooks the pastry slowly from the inside out, driving out moisture and creating that dense, flaky, blister-free crust. The samosas will be pale for a long time before they begin to turn a beautiful golden brown. Be patient. This low-and-slow method ensures a perfectly crisp samosa that stays crisp for hours.