







Understanding Your Indian Wheat
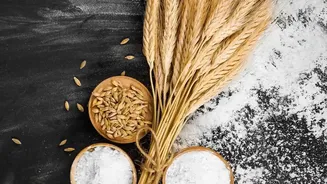
The journey to a perfect sourdough loaf begins with your starter, and the key is understanding your flour. Indian whole wheat flour, or atta, is different from the whole wheat flour used in many Western recipes. Atta is typically stone-milled in a 'chakki',
a process that generates more heat and results in higher starch damage. This makes it excellent for soft rotis, but it also means it absorbs more water. Regular atta has a protein content of around 10-12%, which is slightly lower than typical bread flours but more than sufficient to build a strong starter. In fact, the bran in whole wheat flour naturally carries wild yeasts that can give your starter a fantastic boost. Don't be afraid to use the flours you know; they are perfectly capable of creating a vibrant, active culture.
What You Will Need
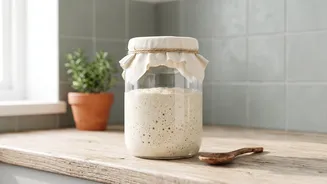
You don’t need any fancy equipment to begin your sourdough journey. Most of what you need is likely already in your kitchen. - Flour: Regular whole wheat atta is an excellent choice to get started. You can also use a mix of atta and maida (all-purpose flour). - Water: Use filtered or RO water. Avoid chlorinated tap water, as it can inhibit the growth of the natural yeasts. - A Glass Jar: A clean, clear glass jar (around 750ml to 1 litre) is perfect. It allows you to see the starter's activity, including bubbles and rise. - A Kitchen Scale: For accuracy, weighing your ingredients is highly recommended. Sourdough is a science, and precision helps ensure consistent results.
Day 1: Creating Your Starter
This is the simplest step. In your clean glass jar, combine equal parts of whole wheat atta and water by weight. A good starting point is 50 grams of atta and 50 grams of water. Mix them thoroughly until no dry flour remains. The consistency should be like a thick batter or paste. Cover the jar loosely with its lid or a piece of cloth. This allows gas to escape while keeping contaminants out. Place the jar in a warm spot in your kitchen, away from direct sunlight, for 24 hours. India's warm climate is actually an advantage, as it can speed up fermentation.
Days 2 to 7: The Feeding Schedule
For the next week, you will need to 'feed' your starter to build its strength. On Day 2, you might see a few bubbles. Discard about half of the starter from the jar. Then, add 50 grams of fresh atta and 50 grams of water. Mix well, cover loosely, and let it sit for another 24 hours. Repeat this process for Day 3. From Day 4 onwards, you may need to increase feedings to twice a day, roughly 12 hours apart, especially in a warm environment. This is because the warm temperature makes the yeast more active, and they consume their 'food' (the fresh flour) faster. Each time, discard about half of the starter before adding the fresh flour and water. This regular refreshment is crucial for developing a stable and active yeast culture.
Signs of a Healthy, Mature Starter
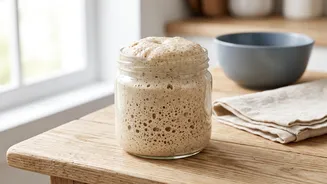
After about a week, your starter should show clear signs of life. A healthy starter will be full of bubbles, not just on the surface but throughout the mixture. It should have a pleasant, tangy aroma, sometimes described as fruity, like yoghurt or even beer. Most importantly, it will develop a predictable rhythm of rising and falling after each feeding, often doubling or even tripling in volume within 4-8 hours. Once it reliably doubles in size and has a bubbly texture and a pleasantly sour smell, it is ready to bake with. Some bakers use the 'float test'—dropping a spoonful into water to see if it floats—but a predictable rise and fall is the most reliable indicator of readiness.
Troubleshooting in a Warm Climate
India's climate presents unique challenges. If your starter becomes very runny and smells overly acidic or like alcohol, it's likely fermenting too quickly due to the heat. Move it to a slightly cooler spot. You might also notice a dark liquid called 'hooch' on top. This is a sign that the starter is hungry. You can either stir it in for a tangier flavour or pour it off before your next feeding. If your starter seems sluggish, ensure you are using a consistent feeding schedule and keeping it in a warm, but not overly hot, location. Patience is the most important ingredient; some starters take a little longer than a week to become fully active.