






More Than Just an Easy Option
Wall push-ups are frequently dismissed as an exercise only for absolute beginners or those in rehabilitation. While they are excellent for both, that view misses the point. By changing the angle of your body against gravity, wall push-ups reduce the load
on your joints, allowing you to focus purely on form and muscle control. They are a legitimate exercise, not just a consolation prize. This makes them an incredibly effective tool for everyone, from seasoned athletes looking to refine their technique to office workers aiming to improve their posture. The exercise engages not just the chest, shoulders, and triceps, but also the core and back muscles, which work to keep your body in a straight, stable line.
The Power of the Slow Bend
The real magic happens when you deliberately slow down the movement, particularly the lowering phase. This is known as increasing the 'time under tension'. When you slowly bend your elbows and bring your chest toward the wall, your muscles are performing an eccentric contraction—they are lengthening while under strain. This phase is crucial for building strength and has been shown to stimulate muscle growth more effectively than faster movements. Rushing through repetitions uses momentum, which robs your muscles of the work they need to do. A slow, controlled bend of 3 to 5 seconds forces the chest, shoulder, and arm muscles to engage deeply through the entire range of motion, exposing any weak points in your form. This mindful approach makes the exercise harder and significantly more beneficial.
How to Perform It Correctly
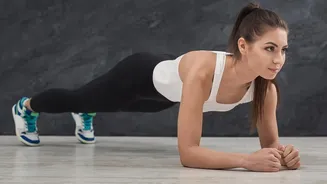
Precision is key to getting the most out of this exercise. Follow these steps for perfect form:1. Stand about an arm's length away from a sturdy wall, with your feet shoulder-width apart.2. Place your palms flat on the wall at shoulder height and slightly wider than shoulder-width.3. Before you move, engage your core by tightening your abdominal muscles and squeezing your glutes. Your body should form a straight line from your head to your heels.4. Inhale and begin to slowly bend your elbows, lowering your chest toward the wall. Aim for a 3 to 5 second count on the way down. Keep your body rigid; don't let your hips sag or your head poke forward.5. Your elbows should track backward at roughly a 45-degree angle from your body, not flared out to the sides like a 'T'.6. Lower yourself until your nose or forehead is close to the wall.7. Exhale and press back to the starting position with control, without locking your elbows at the top.
Common Mistakes to Avoid
Even with a seemingly simple exercise, bad habits can creep in and reduce its effectiveness or even lead to injury. Be mindful of these common errors:Flaring Your Elbows: Pushing your elbows straight out to the sides puts unnecessary stress on your shoulder joints. Keep them tucked at about a 45-degree angle.Sagging Hips: If your core isn't engaged, your lower back will arch and your hips will drop toward the wall. This breaks the straight body line and puts pressure on your spine.Rushing the Movement: The primary mistake is moving too fast, especially on the way down. This relies on momentum instead of muscle strength.Leading with Your Head: Your neck should stay in a neutral position, aligned with your spine. Avoid the temptation to reach toward the wall with your chin.Partial Reps: Ensure you are using a full range of motion, getting your chest as close to the wall as is comfortable before pressing all the way back out.
Progressing Your Wall Push-Up
Once you have mastered the slow-tempo wall push-up, you can increase the challenge. The easiest way to progress is to simply step your feet further back from the wall. This increases the angle of your body and forces your muscles to support more of your body weight. You can also bring your feet closer together to challenge your core stability. For an advanced variation, try performing the push-up with one arm, placing your hand in the center of your body and your other hand behind your back. Another option is to lift one leg off the ground during the exercise. These progressions ensure that you can continue to build strength and stability using this versatile and accessible exercise.