



Know When It's Time
Repotting isn't just about giving your plant a prettier home; it's essential for its health. But how do you know when it's necessary? The best time is typically in the spring, just before the growing season begins. Look for tell-tale signs that your plant has
outgrown its current pot. Are roots poking out of the drainage holes at the bottom? Is the plant top-heavy and tipping over easily? Another key indicator is how quickly the soil dries out. If you find yourself watering far more frequently than you used to, it's likely because the pot is full of roots with very little soil left to hold moisture. To be certain, you can gently slide the plant out of its pot and check the root ball. If you see a dense web of roots circling the bottom, it's officially time to upgrade.
Gather Your Supplies
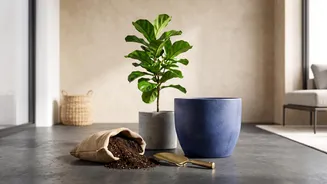
A successful repotting session starts with having everything you need on hand. First, the new pot. As a rule, choose a pot that is only 2 to 5 cm larger in diameter than the old one. It's tempting to go much bigger to save a future job, but this is a common mistake. A pot that's too large holds excess soil, which retains too much moisture and can lead to root rot. Ensure the new pot has drainage holes. Next, you'll need the right soil. Never use soil from your garden, as it's too dense for container plants and can introduce pests. Look for a good-quality, peat-free potting mix specifically designed for indoor plants, which often contains ingredients like coir, perlite, and vermiculite for proper drainage and aeration.
Step 1: The Gentle Removal
To minimise stress on the plant, water it a day before you plan to repot. This makes the root ball easier to handle. When you're ready, turn the plant sideways, hold it gently by the stems, and tap the bottom of the pot until the plant slides out. If it’s stuck, you can carefully run a butter knife around the inside edge to loosen it. Try to support the entire root ball with your hand as it comes free. Avoid pulling the plant out by its stems, as this can cause damage.
Step 2: Inspect and Loosen the Roots
Once the plant is free, take a moment to inspect its roots. Healthy roots are typically firm and whitish. If you see any black, mushy, or foul-smelling roots, this is a sign of root rot; trim these away with clean scissors. Now, gently loosen the root ball with your fingers. If the roots are tightly coiled in the shape of the old pot, carefully tease them apart to encourage them to grow outwards into the new soil. Don't worry if a few small roots break; the goal is simply to break up the dense circling pattern.
Step 3: Settle into the New Home
Add a layer of fresh potting mix to the bottom of the new, larger pot. Place your plant on top of this layer, checking the height. The top of the root ball should sit about an inch below the rim of the new pot to leave room for watering. Hold the plant in the centre and begin filling in the space around the root ball with fresh potting mix. Gently press the soil down to eliminate large air pockets, but don't compact it too tightly. Ensure the original soil level on the plant remains the same; don't bury the stem.
Step 4: Aftercare and Recovery
After repotting, give the plant a thorough watering until you see it run out of the drainage holes. This helps the new soil settle around the roots. It's normal for a plant to show mild signs of stress, like slight wilting, for a couple of weeks after being repotted—this is known as transplant shock. Place your plant back in its usual spot with the appropriate light, but hold off on fertilising. The fresh potting mix has plenty of nutrients to start with. Wait until you see clear signs of new growth, which indicates your plant has successfully adjusted to its new home, before you resume your regular feeding routine.