


The Familiar Mango Mess
For mango lovers across India, the arrival of the king of fruits is a joyous occasion. What’s less joyous is the process of preparing it. We’ve all been there: leaning over the sink, juice dripping down our arms, trying to carve away the skin with a paring knife.
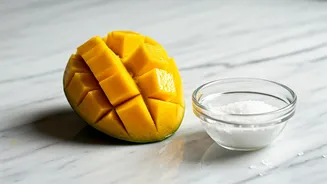
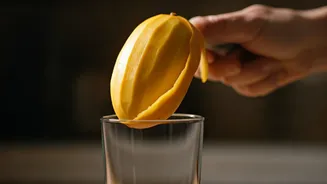
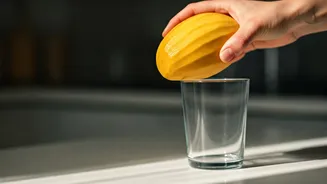
This traditional method, while familiar, is notoriously messy and wasteful. A slippery, awkwardly shaped fruit plus a sharp knife is a recipe for uneven cuts, lost flesh, and even the occasional nicked finger. Then there’s the popular 'glass trick,' where you press a mango cheek against the rim of a drinking glass to scoop out the flesh. It’s clever, but it often leaves a significant amount of fruit still clinging to the skin and doesn’t work well for slicing or dicing.
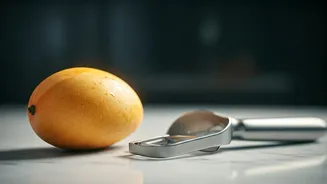
Why a Peeler is the Smart Solution
Enter the humble vegetable peeler. It might seem counterintuitive for such a soft, precious fruit, but for a mango that is ripe yet still firm, a peeler is a game-changer. The primary advantage is precision. A good peeler glides just beneath the surface, removing only the tough, inedible skin while preserving the maximum amount of delicious flesh. This means significantly less waste compared to hacking away with a knife. It’s also much cleaner. Because you are removing the skin in long, controlled strips, you avoid squishing the fruit and releasing a flood of juice. This keeps your hands, your cutting board, and your countertop remarkably clean. Finally, it’s safer. A peeler is designed to move away from your hand, and its blade is less exposed than a knife's, reducing the risk of accidents with a slippery mango.
The Right Tool for the Job
Not all peelers are created equal for this task. The undisputed champion for peeling mangoes is the Y-peeler, also known as a Swiss peeler. Its wide, horizontal blade provides more surface contact, making it easier to manoeuvre around the broad curves of the mango. The design allows you to use a more natural, fluid motion, pulling the peeler towards you or pushing it away with ease. A standard swivel peeler can work in a pinch, but its narrow head can struggle with the mango’s shape, often digging in too deep or skipping over spots. Whichever you use, ensure it is sharp. A dull peeler will tear the skin and bruise the delicate fruit, defeating the purpose of this neat technique.
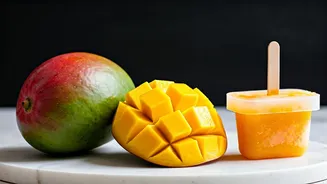
Picking the Perfect Mango
This technique’s success hinges on the condition of your mango. It will not work on an overly soft, mushy, or stringy fruit. The ideal candidate is fragrant and yields to gentle pressure but remains firm to the touch. Think of the texture of a ripe but firm peach. This firmness provides the necessary resistance for the peeler’s blade to catch the skin without gouging the flesh. If the mango is rock-hard, it’s not ripe enough. If it’s extremely soft and your finger leaves a deep indent, it’s past the ideal stage for this method and is better suited for juice, smoothies, or being eaten directly over the sink in the traditional, messy-but-satisfying way. Varieties like Alphonso, Kesar, or even Totapuri when perfectly ripe are excellent for this method.
A Step-by-Step Guide
Ready to try it? Follow these simple steps for a perfectly peeled mango. 1. **Wash and Dry:** Start by thoroughly washing and drying the mango. A dry surface provides a better grip. 2. **Create a Flat Base:** Using a sharp knife, carefully slice off a small piece from the top (stem end) and the bottom of the mango. This creates two flat surfaces, allowing you to stand the mango upright and stable on your cutting board. 3. **Peel Downwards:** Stand the mango on one of its flat ends. Holding it securely at the top, place your Y-peeler at the top edge and pull downwards in a smooth, continuous stroke, following the curve of the fruit. 4. **Rotate and Repeat:** Rotate the mango and repeat the process, peeling away long strips of skin until the entire fruit is bare. The stability from the flat base makes this step surprisingly simple and quick.
From Peeled to Plated
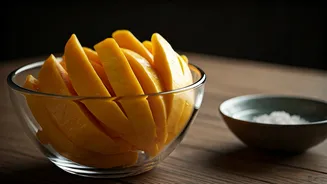
Once your mango is beautifully peeled and standing on the cutting board, the final step is easy. You can see the outline of the large, flat pit (the gutli) in the center. Simply take your knife and slice off the two fleshy 'cheeks' on either side of the pit. Then, trim the remaining fruit from the narrower edges of the pit. What you’re left with are two large, clean pieces of mango, ready to be diced for a salad, sliced for a dessert, or eaten just as they are. No mess, no fuss, and more mango to enjoy.