



First, What Exactly Are Microgreens?
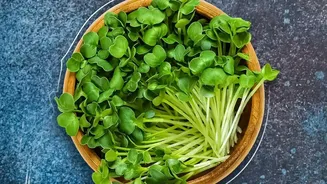
Microgreens are the young seedlings of edible vegetables and herbs. Harvested just after the first true leaves have developed, they are not to be confused with sprouts, which are germinated seeds. Microgreens are more developed than sprouts, but younger
than baby greens. They are prized for their intense flavour profiles and concentrated nutrient content, often containing higher levels of vitamins and carotenoids than their mature counterparts. Think of them as a supercharged garnish or a flavour-packed addition to any meal.
Your Simple Windowsill Shopping List
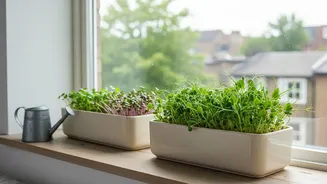
You don't need a sprawling garden or expensive equipment to get started. Most of what you need can be found around the house or with a quick trip to a garden centre. You will need shallow trays—recycled plastic takeout containers work well. Make sure you have at least one tray with drainage holes and one without to act as a water-catching base. You'll also need a growing medium like potting soil or a coconut coir brick, a spray bottle for watering, and of course, seeds. A sunny windowsill that gets several hours of light a day is the final piece of the puzzle.
The Easiest Seeds for Beginners
Not all seeds are created equal when it comes to speed and ease of growth. For your first few attempts, choose varieties that are known to be fast and forgiving. Radish, broccoli, and mustard seeds are excellent choices, often ready to harvest in just 5 to 10 days. Pea shoots and sunflower microgreens are also popular, though they may take a little longer, around 8 to 12 days. These varieties germinate reliably and grow quickly, which provides the satisfaction of a fast harvest and builds confidence for trying more challenging greens later.
A Step-by-Step Guide to Planting
Start by moistening your growing medium and spreading it evenly in your tray with drainage holes, about an inch or two deep. Scatter your seeds densely across the surface; unlike traditional gardening, microgreens thrive when crowded. Gently press the seeds into the soil and give them a light misting of water. For the first few days, most seeds need a 'blackout period' to germinate. You can achieve this by placing a second tray on top of the seeds. This darkness encourages stronger stem growth. Check daily and mist lightly if the soil feels dry.
From Sprout to Harvest
After two to four days, you'll see your seeds have sprouted. Now it's time to introduce them to light. Remove the top cover and place the tray on your sunniest windowsill. Continue to water them, preferably from the bottom by adding water to the base tray, to avoid damaging the delicate stems or encouraging mold. Your greens will grow rapidly over the next week. Most varieties will be ready to harvest in 7 to 14 days from planting. You'll know they're ready when they are 2-4 inches tall and have developed their first set of true leaves. To harvest, simply use a sharp pair of scissors and snip the greens just above the soil line.
Enjoying Your Fresh Harvest
The best part of growing your own microgreens is, of course, eating them. Their flavours range from peppery (radish, arugula) to mild and nutty (sunflower, broccoli). Rinse them gently and pat them dry. Use them to add a fresh, crunchy element to salads and sandwiches. Sprinkle them over soups, pizzas, or avocado toast for a pop of flavour and a nutritional boost. Because you grew them yourself without any pesticides, you can be confident you're eating the freshest, cleanest greens possible. The quick turnaround means you can start a new tray every week for a continuous supply.