


Why This Combination Works So Well
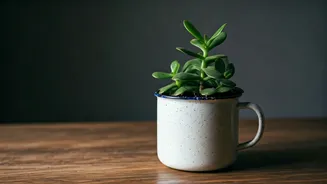
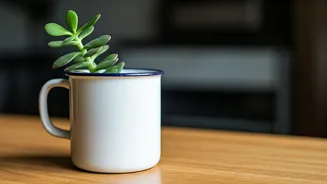
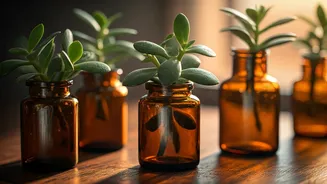
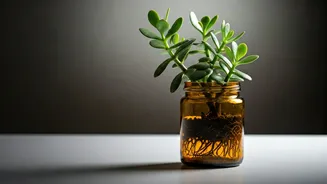
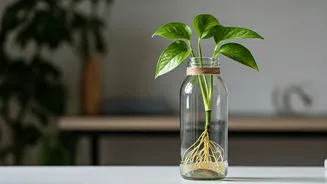
The humble jade plant (Crassula ovata) is a superstar of the houseplant world for good reason. It’s famously low-maintenance, thrives on a bit of neglect, and its fleshy, jewel-like leaves symbolise good luck and prosperity. Paired with a recycled amber
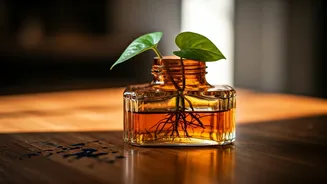
jar—perhaps from a finished candle, a bottle of tonic, or a skincare product—the project becomes an exercise in sustainable style. The warm, brown-tinted glass filters harsh sunlight, creating a gentle environment for new roots to form. It also partially obscures the water, giving the setup a clean, minimalist aesthetic that looks intentional, not just like a science experiment on your desk. This combination is the perfect entry point into plant propagation: it’s forgiving, affordable, and delivers a seriously high-end look for virtually no cost.
Gathering Your Simple Materials
The beauty of this project lies in its simplicity. You don't need a trip to a specialty store; you likely have everything you need at home already. Before you begin, gather the following items: * **A Healthy Jade Plant:** You’ll need a 'mother plant' from which to take a cutting. If you don't have one, ask a friend! Jade plants are famously easy to share. * **Clean, Sharp Scissors or Pruners:** Using a clean tool prevents the transfer of disease to the mother plant or the new cutting. * **A Recycled Amber Glass Jar:** Clean it thoroughly. A vessel with a narrower neck can help support the cutting, but any shape will do. * **Water:** Room-temperature water is best. Filtered or distilled water can be used if your tap water is heavily treated, but it’s usually not necessary.
How to Take the Perfect Cutting
The success of your propagation starts with a good cutting. You can propagate jade from a single leaf, but a stem cutting is generally faster and more robust. Look for a healthy, mature stem that is at least 3-4 inches long and has several leaf nodes (the points where leaves emerge from the stem). Using your sharp, clean scissors, make a clean cut just below a leaf node. Gently remove the lowest one or two pairs of leaves from the cutting. This is important because it exposes the nodes where new roots will sprout, and it prevents leaves from rotting in the water. After taking the cutting, let it sit out in a dry, shady spot for 1-3 days. This allows the cut end to 'callus' over, which significantly reduces the risk of it rotting once placed in water.
Preparing the Jar and Starting the Process
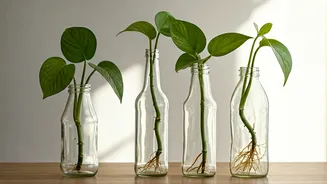
While your cutting is callusing, prepare its new home. Wash your amber jar thoroughly with soap and warm water to remove any residue, and rinse it well. Once the cut end of your jade stem is dry to the touch, it’s time for the magic. Fill the jar with enough room-temperature water so that the exposed nodes at the bottom of the stem are submerged, but the remaining leaves are well above the waterline. Don’t submerge the entire stem. Place the cutting into the jar, using the rim to support it if needed. And that’s it. The active part of the project is complete; now, nature takes over.
Patience, Placement, and Care
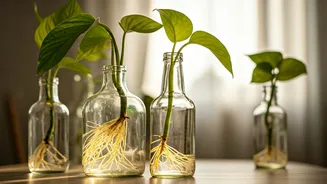
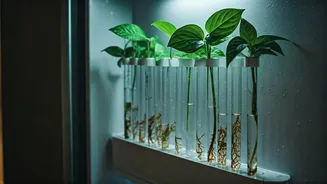
Find a spot for your new propagation station that receives plenty of bright, indirect light. A spot on your desk a few feet from a window is perfect. Direct, harsh sunlight can scorch the leaves and promote algae growth in the water. Now comes the hardest part: waiting. Jade plants are not the fastest propagators. It can take anywhere from three weeks to over two months for you to see the first signs of delicate, white roots emerging from the submerged nodes. During this time, your only job is to change the water every 5-7 days to keep it fresh and oxygenated. This prevents bacterial growth and keeps your cutting healthy. Simply slide the cutting out, rinse the jar, refill with fresh water, and place it back inside.
When to Move Your Plant to Soil
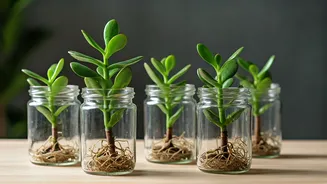
Watching the root system develop is one of the most rewarding parts of the process. Once the new roots are about one to two inches long, your cutting is ready to be transferred to soil. Roots grown in water (hydroponic roots) are more delicate than those grown in soil, so a well-established network is needed for a successful transition. Prepare a small pot with a drainage hole and fill it with a well-draining succulent or cactus mix. Make a small hole in the centre of the soil, gently place the rooted cutting inside, and backfill around it, patting the soil down lightly. Water it thoroughly and place it back in its bright, indirect light spot. Your desktop goal is now a permanent, potted plant.