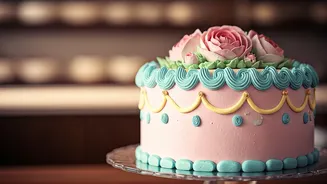


What Makes a Cake 'Vintage'?
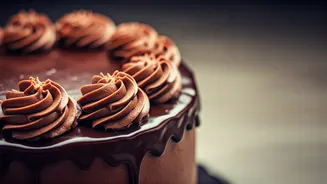
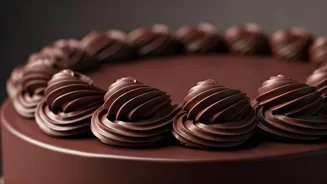
The term "vintage cake" refers to a style of elaborate, over-the-top piping that feels both nostalgic and incredibly ornate. This decorative art form can be traced back to the Lambeth method, a technique developed in the early 20th century known for its
intricate layers of icing, swags, and frills. Modern viral versions embrace this maximalist approach, featuring detailed shell borders, delicate ruffles, and dramatic flourishes, often in pastel or contrasting colours. This style is a departure from the minimalist, naked cakes that have dominated recent years, bringing a sense of craftsmanship and playful elegance back to the forefront. The result is a cake that is not only a dessert but a photogenic work of art.
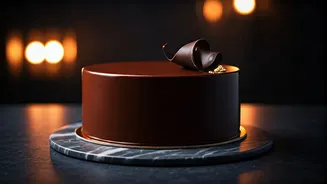
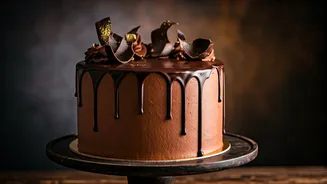
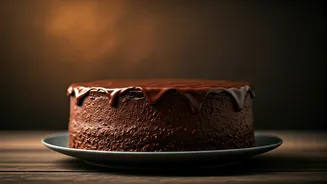
The Heart of the Cake: Rich Chocolate and Ganache
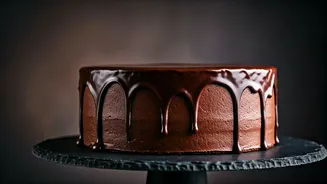
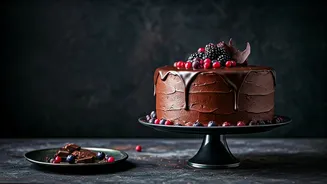
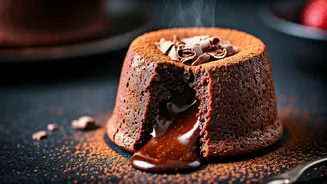
Beneath the frilly exterior lies a timeless classic: a dark chocolate cake. The deep, rich flavour of a moist chocolate sponge provides the perfect contrast to the sweet buttercream or ganache used for decorating. The use of dark or Dutch-process cocoa powder and often coffee in the batter creates a tender crumb and an intensely satisfying chocolate taste that isn't overly sweet. This classic cake base is then often coated in a decadent chocolate ganache. Ganache, a simple mixture of chocolate and warm cream, can be used as a smooth, glossy drip or whipped into a light, fluffy frosting. Its silky texture and rich flavour make it the ideal partner for the elaborate vintage piping.
The Ultimate Dark Chocolate Cake
This recipe yields a moist, deeply flavourful two-layer cake that serves as the perfect canvas for your vintage decorations. Ingredients: 2 cups all-purpose flour 2 cups granulated sugar ¾ cup unsweetened Dutch-process cocoa powder 2 tsp baking soda 1 tsp baking powder 1 tsp salt 1 cup buttermilk, room temperature ½ cup vegetable oil 2 large eggs, room temperature 1 tsp vanilla extract * 1 cup hot strong brewed coffee Instructions: 1. Preheat your oven to 175°C (350°F). Grease and flour two 8-inch round cake pans, and line the bottoms with parchment paper. 2. In a large bowl, whisk together the flour, sugar, cocoa powder, baking soda, baking powder, and salt. 3. In a separate bowl, combine the buttermilk, oil, eggs, and vanilla extract. Add the wet ingredients to the dry ingredients and mix on medium speed until just combined. 4. Carefully pour the hot coffee into the batter and whisk until smooth. The batter will be thin; this is normal. 5. Divide the batter evenly between the prepared pans. Bake for 30-35 minutes, or until a wooden skewer inserted into the center comes out clean. 6. Let the cakes cool in the pans for 10 minutes before inverting them onto a wire rack to cool completely.
Foolproof Dark Chocolate Ganache
For a glossy drip or a smooth coating, a simple ganache is key. The ratio of chocolate to cream is important for the right consistency. Ingredients: 225g (8 oz) dark or semi-sweet chocolate, finely chopped 240ml (1 cup) heavy cream Instructions: 1. Place the finely chopped chocolate in a heatproof bowl. 2. Heat the heavy cream in a small saucepan over medium heat until it begins to steam and small bubbles form around the edges. Do not let it boil. 3. Pour the hot cream over the chopped chocolate, ensuring all the chocolate is covered. Let it sit undisturbed for 5 minutes to melt the chocolate. 4. Whisk gently, starting from the center and working your way out, until the mixture is completely smooth and glossy. 5. Let the ganache cool at room temperature. For a pourable drip, it should be slightly warm, about 10-15 minutes. For a spreadable frosting, let it cool and thicken for 1-2 hours.
Achieving the Vintage Look
Decorating is where the magic happens. You'll need a good buttercream for piping, as it holds its shape well. Start with a crumb coat—a thin layer of frosting over the entire cake to trap any loose crumbs—and chill the cake for at least 20 minutes before decorating. To create the signature vintage look, you'll want to layer different piping techniques. Use a large star tip (like a Wilton 1M or 4B) to create shell borders along the top and bottom edges. From there, add smaller details like reverse shells, ruffles, or swags using various piping tips. Don't be afraid to practice on parchment paper first to get a feel for the pressure and motion. The key is to build layers of detail, starting with larger pipes and adding smaller, more delicate ones on top.