



Gather Your Materials and Tools
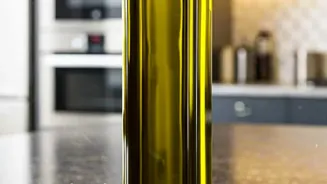
Before you begin, gather everything you need. A little preparation makes the entire process smoother. You will need a clean, empty glass olive oil bottle, a bottle lamp kit, an appropriately sized lampshade, and a light bulb. Most hardware stores sell
bottle lamp kits that include a pre-wired socket, cord, and various adapters to fit different bottle openings. Some kits are designed for a cord that exits from the top of the bottle, which means you don't have to drill any glass. For a sleeker look with a hidden cord, you’ll need a kit that allows you to wire it through the base. For that method, the most important tool is a drill with a glass-and-tile or diamond-tipped drill bit, which is essential for safely cutting through the glass. You will also need essential safety gear: safety goggles and gloves are non-negotiable when drilling glass. A bit of painter's tape can also help prevent the drill bit from slipping.
Step 1: Clean and Prepare Your Bottle
The first step is to ensure your olive oil bottle is perfectly clean and dry, inside and out. Any lingering oil residue can be stubborn, so wash it thoroughly with hot, soapy water and a bottle brush. For removing sticky labels, soaking the bottle in warm water can help loosen the adhesive. If any stubborn glue remains, a dedicated adhesive remover can make the job much easier. Once the label is gone and the bottle is clean, rinse it well and let it air-dry completely. This might take a day or two, as moisture can get trapped inside. A pristine bottle not only looks better but also ensures that the internal electrical components will remain clean and secure.
Step 2: Carefully Drill the Cord Hole
This is the most critical step and requires patience and care. Do not attempt to drill glass without proper safety gear. Put on your safety goggles and gloves. To achieve a clean hole for the electrical cord, you must use a drill bit specifically designed for glass. Mark the spot where you want to drill the hole, usually near the bottom on the back side of the bottle. A piece of painter’s tape over the mark can provide grip and prevent the drill bit from wandering when you start. The key to drilling glass without it cracking is to keep it cool and wet. You can do this by slowly trickling water over the area as you drill. Start your drill at a very low speed, applying light, steady pressure. Let the diamond bit do the work of grinding the glass away rather than forcing it. This process can take several minutes, but patience is crucial to avoid shattering the bottle. Once you’ve drilled through, rinse the bottle to remove any glass dust.
Step 3: Assemble the Lamp Components
With the hole drilled, it’s time to assemble your lamp. Start by carefully feeding the lamp cord from your kit through the hole you just drilled and up through the neck of the bottle. You may need to use a piece of wire or long tweezers to help guide it out of the top. Bottle lamp kits come with various rubber or cork adapters designed to create a snug fit in the bottle’s opening. Select the adapter that best fits your olive oil bottle and slide it onto the cord. Next, attach the lamp socket base (also called the harp bottom and threaded nipple) into the adapter, making sure it’s secure. Follow the specific instructions in your lamp kit to connect the electrical wires to the screws on the socket—typically, the ribbed wire connects to the silver screw (neutral) and the smooth wire to the brass screw (hot). Once wired, slide the socket cover on and click it into place.
Step 4: Add the Finishing Touches
Your custom lamp is almost complete. Now for the fun part: choosing a lampshade and bulb. To honor the sleek, minimalist aesthetic, consider a simple drum shade in a neutral color like white, cream, or black. The lampshade should be wider than the widest part of the bottle to create a balanced look. The style of the lampshade attachment is also important; many kits use a harp that you install before wiring, while others support a shade that clips onto the bulb or screws directly onto the socket. Finally, choose a light bulb. An LED bulb is an energy-efficient choice, and for a touch of vintage flair, an Edison-style bulb can look stunning, especially if it’s partially visible through the shade. Screw in your bulb, plug in your new lamp, and enjoy the warm glow of your handmade, upcycled creation.