







Transforming your delicate origami creations from a tabletop hobby into stunning wall decor can feel daunting. This guide provides the ideas and techniques you need to arrange your handmade paper art into a neat, eye-catching masterpiece.
Planning Your Paper Masterpiece
Before you fold
a single sheet, the first step is to envision the final look. Consider the room where the art will hang. What is the existing colour scheme? You can choose paper that complements the room's palette or create a bold contrast. Think about the theme. Do you want a flock of cranes creating a sense of movement, a geometric pattern for a modern feel, or a burst of colourful flowers? Deciding on a theme and colour story beforehand will make the entire process more cohesive. Measure the wall space you intend to use. This will help you determine the scale of your project—whether it's a small, focused piece or a large, dramatic mural.
Choosing and Folding Your Models
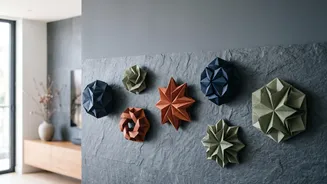
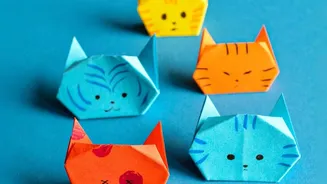
The beauty of origami is its variety. For a wall display, you can mix simple, classic models with more complex, sculptural ones. Geometric shapes like hexagons, triangles, or modular sonobe units are fantastic for creating repeating patterns and modern quilt-like effects. These are often great for beginners. More intricate models like animals, flowers, or butterflies can be grouped to create a focal point. Consider varying the size of your models to add visual interest and depth. Using different sizes of the same model, folded from the same or complementary papers, can create a dynamic and professional-looking installation. Remember to make crisp, precise folds for the neatest possible appearance.
Protecting Your Paper Creations
Paper is a delicate medium, susceptible to dust, moisture, and fading from sunlight. To ensure your artwork lasts, it’s wise to take protective measures. If you plan to display the origami openly, consider applying a UV-protective spray sealant. Always test the spray on a scrap piece of paper first to ensure it doesn't cause discolouration. For maximum protection, framing is your best option. Shadow boxes are ideal for 3D origami, as their depth prevents the glass from crushing the model. When framing, always use acid-free backing materials to prevent yellowing over time and opt for UV-filtering glass or acrylic to shield your art from fading.
Mounting Methods for a Flawless Finish
How you attach your art to the wall is crucial for a neat presentation. For lightweight, individual pieces arranged directly on the wall, removable adhesive strips or mounting putty are excellent choices that won't damage your paint. For heavier pieces or a collection mounted on a backing board, more secure methods are needed. You can glue your folded shapes onto a stiff piece of foam board or cardboard, which can then be hung. When placing 3D models in a shadow box, using small pins or acid_free adhesive foam squares can secure them in place while creating attractive shadows and a sense of depth.
Designing the Perfect Layout
The arrangement of your origami is where your creativity truly shines. A grid layout, with models placed in uniform rows and columns, offers a clean, modern, and orderly look. For a more organic and dynamic feel, consider a free flowing arrangement, like a swirling flock of birds or a cascade of butterflies. You can also create a larger shape out of smaller models, such as forming a heart or a circle. Before committing, lay your pieces out on the floor to experiment with different compositions. Take a photo of your favourite layout to use as a reference during the final installation on the wall. This planning step helps avoid misplaced pieces and ensures the final result matches your vision.