


Why an Old Chest?
In a world of mass-produced furniture, an upcycled chest offers something priceless: character. These old trunks, often called sandooks in India, carry stories in their scuffs, dents, and hardware. Transforming one into a table isn't just a budget-friendly
move; it's an act of creative preservation. You get a piece of furniture that's not only functional but also a conversation starter, imbued with a sense of history. Plus, many chests offer built-in storage—a huge bonus for modern homes where space is a premium. It’s a perfect blend of vintage charm, practicality, and sustainability, allowing you to reduce waste while adding a deeply personal touch to your décor.
Hunting for the Perfect Piece
The hunt is half the fun! Keep your eyes peeled at local kabadiwalas, flea markets, Chor Bazaar-style marketplaces, and online platforms like OLX. Don't be afraid of a little wear and tear; cosmetic issues are fixable. Focus on the 'bones' of the chest. Look for solid wood construction, as particleboard or MDF won't hold up as well. Check for major structural damage like large cracks, wood rot, or severe water damage, which can be difficult and costly to repair. Unique hardware, like old brass latches or iron handles, is a huge plus, even if it's tarnished. A musty smell is common and can usually be aired out and cleaned, so don't let that be an immediate deal-breaker.
Gather Your DIY Toolkit
Before you start, gather your supplies to ensure a smooth workflow. You don’t need a professional workshop, just a few key items. For Cleaning & Prep: - Mild soap, water, and cloths - Sandpaper (medium and fine grit) or a sanding block - Wood filler for any cracks or holes For Painting & Finishing: - Primer (especially for covering dark stains or ensuring paint adheres) - Your choice of paint (chalk paint for a rustic look, enamel for a sleek finish) or wood stain - Paintbrushes and rollers - A clear sealant (polyurethane or wax) for protection For Assembly: - A drill with screw bits - A set of table legs (options range from simple wooden pegs to modern hairpin legs) - Screws appropriate for the thickness of your chest’s base
Step 1: The All-Important Prep
Don't skip the prep work—it's the foundation of a professional-looking finish. Start by giving the entire chest a thorough cleaning inside and out with soap and water. Let it dry completely. If you’re keeping the original hardware, you can either remove it now or carefully tape over it. Next, sand the entire exterior. This crucial step removes the old, flaky finish and creates a rough surface for the primer and paint to grip onto. Start with a medium-grit sandpaper to tackle a thick varnish, then move to a fine-grit for a smooth finish. Wipe away all the dust with a damp cloth. If there are any gouges or unwanted holes, fill them with wood filler, let it dry, and then sand it flush with the surface.
Step 2: Paint, Stain, Transform
Now for the fun part. Apply a thin, even coat of primer. This prevents the old wood colour from bleeding through your new paint and helps the top coat last longer. Once the primer is dry, it's time for colour. Whether you choose a bold, modern colour, a classic white, or a rich wood stain, apply it in thin, even coats. Allow each coat to dry completely before applying the next—patience is key to avoiding drips and a tacky finish. For a rustic, shabby-chic look, chalk paint is an excellent, forgiving option. For a sleek, contemporary feel, a semi-gloss or gloss enamel paint works wonders. You could even get creative with stencils or hand-painted patterns for a truly one-of-a-kind design.
Step 3: Legs and Finishing Touches
Once your paint or stain is fully cured, it's time to turn your chest into a table. Flip the chest upside down on a soft surface to avoid scratching your new finish. Position your chosen legs at the corners. Hairpin legs are a popular choice for a mid-century modern vibe, while simple block legs offer a more traditional feel. Measure carefully to ensure they are evenly spaced and equidistant from the edges. Use your drill to attach the legs securely with screws. Finally, apply one or two coats of a clear sealant like polyurethane (in a matte, satin, or gloss finish) to the entire piece, especially the top surface. This will protect your table from spills, scratches, and daily wear and tear.
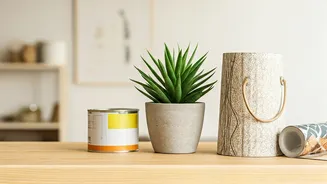
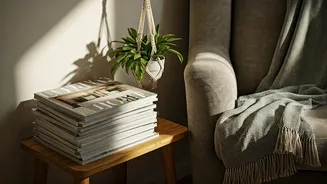
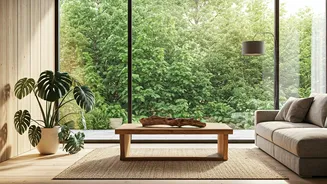
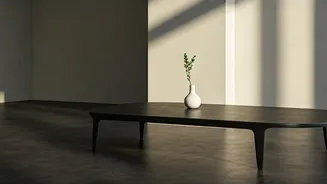
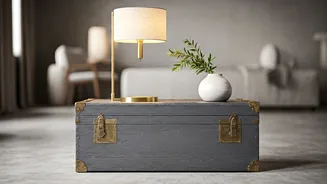
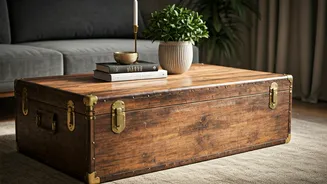
Styling Your New Masterpiece
Your new table is ready for its debut! As a coffee table, it becomes the anchor of your living room. Style it with a tray to corral small items, a stack of art books, a small plant, and a scented candle. If it’s a smaller chest, it can serve as a chic side table next to a sofa or armchair, holding a lamp and your evening cup of chai. In an entryway, it’s the perfect spot to drop your keys and mail, with the added benefit of storing shoes or other outdoor essentials inside. Don't be afraid to mix styles—the vintage character of the chest pairs beautifully with modern, minimalist, and eclectic decor alike.