



The Comfort We Crave
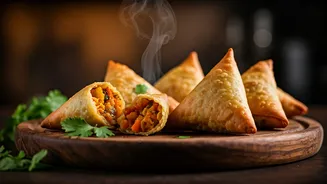
The samosa is more than just a snack; it’s a national treasure wrapped in a triangle of dough. It’s the perfect partner to a cup of masala chai on a rainy day, the star of every get-together, and the quick street-side bite that never disappoints. Its
crispy exterior gives way to a warm, spiced filling, creating a sensory experience that spells comfort. But let’s be honest: the traditional method of deep-frying, which gives the samosa its signature crunch, is also its biggest health drawback. The high heat and oil absorption load it with calories and unhealthy fats, turning a beloved treat into a guilty pleasure many of us try to limit.
The Simple Swap: Baking Over Frying
This is where your oven comes to the rescue. The simple act of baking samosas instead of frying them is a game-changer. By baking, you drastically reduce the amount of oil the pastry absorbs. Instead of being submerged in fat, the samosas are cooked by dry heat, with just a light brush of oil on the surface to help them turn golden and crisp. The result is a snack that is significantly lower in calories and fat, making it a much friendlier option for regular enjoyment. You get all the warmth and flavour of the filling and a satisfyingly crunchy shell, but without the heavy, greasy feeling that can follow a deep-fried binge. It’s the same comfort, just made smarter.
Getting the Perfect Baked Crust
The biggest challenge with baked samosas is achieving a crust that is flaky and crisp, not dry and hard. The secret lies in the dough. While a traditional maida-based dough works, you can make it healthier by using a 50/50 mix of whole wheat flour (atta) and all-purpose flour (maida). The key to a flaky texture is adding a 'moyan' or fat to the flour before kneading. Use a couple of tablespoons of hot oil or ghee and rub it into the flour until it resembles breadcrumbs. Knead the dough with cold water to form a firm, stiff dough—a soft dough will not yield a crispy crust. Let it rest for at least 30 minutes. Finally, just before baking, brush each samosa lightly with milk or a bit of oil. This simple step helps the crust brown beautifully and develop that essential crunch.
Rethinking the Filling
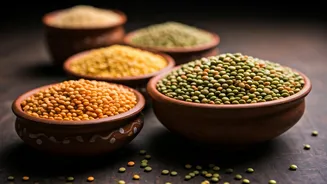
While the classic spiced potato and pea filling is timeless, the shift to a healthier cooking method is the perfect excuse to experiment with nutritious fillings. When preparing your filling, focus on sautéing with minimal oil. The classic aloo masala is wonderful, but you can lighten it up by adding more vegetables like carrots and corn. For a protein boost, consider a filling of spiced paneer bhurji, soya granules, or cooked lentils (dal). A savoury chicken keema or even a mix of mushrooms and onions can also make for a delicious and lighter alternative. The goal is to pack the inside with as much flavour and nutrition as possible, complementing the lighter, baked exterior.
Your Baking Blueprint
Ready to bake? The process is straightforward. First, preheat your oven to 200°C (400°F). While it heats up, roll out your dough, cut it, form your cones, and stuff them with your chosen filling, sealing the edges firmly with a little water. Arrange the prepared samosas on a baking tray lined with parchment paper, ensuring they have a little space between them. Brush them lightly with oil or milk. Bake for 15-20 minutes, then carefully take the tray out, flip the samosas over, and bake for another 10-15 minutes. They are ready when they are golden brown, crisp to the touch, and cooked through. Keep an eye on them, as oven temperatures can vary.