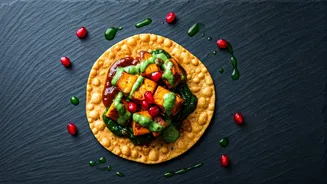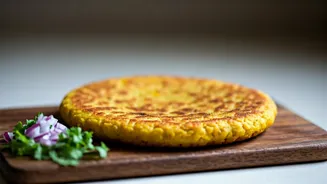

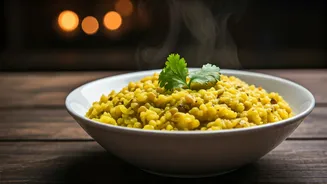


More Than Just a Pancake
Across India, the besan chilla (or cheela) is a staple for a reason. This savoury pancake, made from gram flour (besan), is a powerhouse of plant-based protein and fibre, making it a fantastic choice for breakfast, a light lunch, or a quick snack. Unlike
many breakfast options, it’s naturally gluten-free and can be easily made vegan. But its true magic lies in its simplicity and versatility. The problem? Many homemade chillas end up either too dense, too soft, or bland. They stick to the pan or break when flipped. The recipe everyone secretly wants is one that guarantees a chilla with golden, crispy edges and a soft, flavour-packed centre—a chilla that holds together beautifully and tastes as good as the ones from a favourite street vendor or a doting grandmother’s kitchen. This guide is your key to unlocking that perfection.
The Perfect Batter: Your Foundation
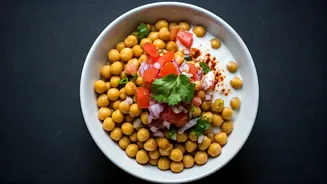
The secret to a stellar chilla begins and ends with the batter. Get this right, and you're halfway there. For two generous chillas, you'll need: - 1 cup Besan (Gram Flour) - Approx. ¾ to 1 cup Water - ¼ cup finely chopped Onion - 2 tbsp finely chopped Tomato (deseeded) - 1-2 Green Chillies, finely chopped - 1 tbsp chopped fresh Coriander - ½ tsp Ajwain (Carom Seeds) - essential for digestion and flavour! - ¼ tsp Turmeric Powder (Haldi) - A pinch of Asafoetida (Hing) - Salt to taste - Ghee or Oil for cooking In a mixing bowl, whisk the besan with a small amount of water to form a thick, lump-free paste. This initial step is crucial to avoid lumps. Gradually add the rest of the water while whisking continuously until you have a smooth, flowing batter. The ideal consistency is similar to that of a dosa batter or a crepe batter—not too thick, not too watery. Now, add all the chopped vegetables, herbs, and spices. Mix well. The final, non-negotiable step: let the batter rest for at least 15-20 minutes. This allows the besan to hydrate fully, resulting in a softer chilla.
The Art of the Sizzle
Cooking the chilla is where technique truly shines. Follow these steps for a flawless result: 1. Heat Your Pan: Place a non-stick tava or a well-seasoned cast-iron pan over medium heat. A pan that is too hot will cook the chilla too fast, leaving the inside raw. A pan that isn't hot enough will make the chilla stick. 2. Grease Lightly: Once the pan is moderately hot, drizzle a little oil or ghee and spread it evenly. You don’t need to deep-fry it; a thin layer is sufficient. 3. Pour and Spread: Give your rested batter a quick stir. Take a ladleful of the batter (about ¼ to ⅓ cup) and pour it onto the centre of the pan. Working quickly, use the back of the ladle to spread the batter outwards in a circular motion, forming a thin, even circle. Don’t make it too thick. 4. Patience is Key: Let it cook on medium heat for about 2-3 minutes. You will see the top surface start to look dry and the edges will begin to lift slightly from the pan. Drizzle a few drops of oil or ghee around the edges and on top.
The Flip and Finish
This is the moment of truth for many home cooks. Don’t rush it. Once the edges are crisp and the top is mostly set, gently slide a thin, flat spatula underneath the chilla. If it lifts easily, you’re ready to flip. If it offers resistance, give it another 30 seconds. Flip it confidently and cook the other side for another 1-2 minutes until it has golden-brown spots. The second side will always cook faster than the first. For an extra-crispy texture, you can press down gently with the spatula as it cooks. Once done, slide it onto a plate. Don't stack hot chillas directly on top of each other, as the steam will make them soft. Instead, place them side-by-side or on a wire rack if making a large batch.
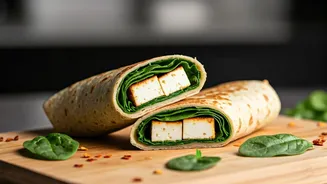
How to Serve Your Perfect Chilla
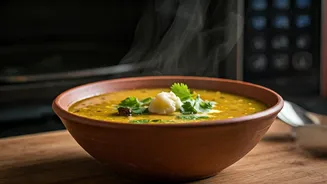
A great chilla needs the right companions. The classic pairing is a duo of chutneys—a tangy green coriander-mint chutney and a sweet-and-sour tamarind chutney. A simple bowl of plain dahi (yogurt) or a side of spicy mango pickle (aam ka achaar) also works wonderfully. For a more filling meal, you can even add a layer of crumbled paneer or shredded cheese on one half of the chilla before folding it over in the pan. Serve it hot, straight from the pan, to enjoy that delightful contrast between the crispy edges and the soft, savoury interior. This isn't just food; it's a comforting, satisfying experience that you can now master in your own kitchen.