


The Ultimate Renter-Friendly Upgrade
For anyone on a student budget and a strict rental agreement, major decor changes are usually off the table. This is where peel-and-stick wallpaper shines. Designed to be temporary, it functions like a large, high-quality sticker that adheres to your
wall without needing messy glue or paste. The low-tack adhesive is strong enough to last for years but is specifically engineered to be removed without pulling off paint or leaving behind sticky residue, making it ideal for temporary housing. This means you can add a dramatic accent wall or a fun pattern to your room and simply peel it off when it's time to move out, leaving the wall exactly as you found it. It’s a high-impact, low-commitment way to make a space truly feel like your own.
What is Colour-Blocking?
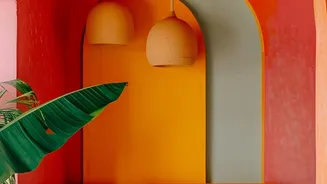
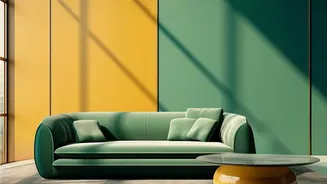
Colour-blocking is an interior design technique that uses two or more solid blocks of colour to create a bold, graphic effect. Think of it as creating geometric shapes, splitting a wall horizontally, or highlighting an architectural feature like an alcove with a contrasting hue. This method is incredibly effective in small spaces, as it can create visual interest and even make a room feel larger or more structured. While traditionally done with paint, using peel-and-stick wallpaper to colour-block is faster, cleaner, and completely reversible. You can mix patterns and solid colours, create two-tone walls, or even design a freeform shape for a truly unique mural effect.
Your Step-by-Step Application Guide
Applying peel-and-stick wallpaper is straightforward, but preparation is key to a flawless finish. First, ensure your wall is clean and smooth. Wipe it down with a damp cloth to remove any dust or grease and let it dry completely. Avoid applying to freshly painted walls; paint needs at least four weeks to fully cure. 1. Measure and Cut: Measure your wall and cut the wallpaper panel, leaving a few extra inches at the top and bottom for trimming.2. Peel Back a Small Section: Don't remove the entire backing at once. Start by peeling back about 12 inches from the top of the panel.3. Position and Align: Starting from a top corner, press the exposed adhesive section onto the wall. Use a level to ensure your first panel is perfectly straight, as it will guide the rest of your design.4. Smooth It Out: As you slowly pull the backing paper down, use a plastic smoother or a credit card to press the wallpaper onto the wall. Work from the center outwards to push out any air bubbles.5. Trim the Excess: Once the panel is in place, use a sharp craft knife to trim the excess wallpaper along the ceiling and skirting board for a clean edge.
Pro Tips for a Perfect Finish
While the process is simple, a few tips can help you avoid common mistakes. If you get a bubble, don't panic. You can often gently lift the wallpaper and re-smooth it. For a tiny bubble that appears later, a small pinprick will release the air, allowing you to smooth it flat. When applying multiple panels, align the edges carefully for a seamless look. Some wallpapers are designed to be butt-jointed (edge to edge), while others require a slight overlap—check the manufacturer's instructions. It’s also wise to test a small sample in a hidden area first to ensure it adheres well to your wall's paint and texture and removes cleanly.
Easy Removal, No Drama
When your lease is up or you're ready for a new look, removal is just as simple as the application. Start at a top corner and gently pull the panel downwards at a slow, steady pace. Pulling at a shallow angle, close to the wall, is the best technique to prevent any paint from lifting. If you encounter a stubborn spot, a little heat from a hairdryer on a low setting can help soften the adhesive and make it release more easily. Any minor residue left behind can typically be wiped away with a damp, soapy cloth, ensuring you leave the walls in perfect condition for the next tenant.