



Understanding Arrowroot Flour
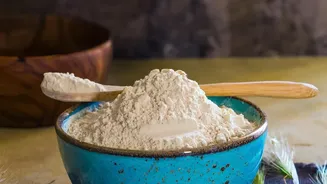
So, what exactly is arrowroot? It's a starch extracted from the root of a tropical plant called Maranta arundinacea. Unlike cornstarch, which can sometimes leave a chalky taste or cloudy appearance, arrowroot is completely flavorless and thickens into
a clear, glossy finish. This makes it ideal for fruit sauces and glazes. It's also more easily digested than cornstarch for many people. Its key benefits are its versatility and its ability to create light, delicate textures in baked goods and an incredibly crisp coating for fried foods. It's a fantastic pantry staple for anyone exploring gluten-free cooking or simply looking for a superior thickener.
1. The Star: Fluffy Arrowroot Pancakes With Fruit Toppings
These pancakes are the perfect showcase for arrowroot's ability to create a light and fluffy texture. Blending it with another gluten-free flour, like almond or brown rice flour, yields a tender crumb that’s simply delicious. For a batch of about eight pancakes, whisk together 1 cup of almond flour, 1/2 cup of arrowroot flour, and 2 teaspoons of baking powder. In a separate bowl, mix 2 eggs, 1/2 cup of milk (dairy or plant-based), and a teaspoon of vanilla extract. Combine the wet and dry ingredients until just smooth, being careful not to overmix. Cook spoonfuls of the batter on a lightly greased griddle over medium heat until bubbles form, then flip and cook until golden brown. Serve immediately with a vibrant topping of fresh mixed berries, sliced banana, and a drizzle of pure maple syrup.
2. Crispy & Light Arrowroot Tempura
One of arrowroot’s most impressive uses is in frying. It creates a coating that is exceptionally light and crispy. For a simple tempura-style batter perfect for vegetables or seafood, you don’t need much. Simply whisking arrowroot flour with ice-cold sparkling water until you have a thin, pancake-like batter is a great start. A common ratio is about 1 cup of arrowroot flour to 1 cup of cold liquid. Pat your vegetables (like sweet potato sticks, broccoli florets, or onion rings) or shrimp completely dry. Dip them in the batter, letting any excess drip off, and fry in hot oil until golden and crisp. The arrowroot creates a delicate, crunchy shell that doesn't feel heavy or greasy, making for a perfect appetizer or main course.
3. Silky Smooth Sauces and Gravies
Arrowroot is an excellent alternative to cornstarch or wheat flour for thickening sauces. It works particularly well in acidic sauces, like a sweet and sour or a lemon glaze, where cornstarch can sometimes break down. To use it, always make a 'slurry' first. For every cup of liquid you want to thicken, start by mixing 1 to 2 teaspoons of arrowroot powder with an equal amount of cold water until it forms a smooth paste. Whisk this slurry into your simmering sauce at the end of the cooking process. The sauce will thicken almost instantly. Be careful not to boil the sauce for too long after adding arrowroot, as prolonged high heat can cause it to thin out again. The result is a beautifully clear, glossy sauce with a silky texture.
4. Chewy Arrowroot Chocolate Chip Cookies
In baking, arrowroot flour helps create a softer, chewier texture, making it a fantastic addition to gluten-free cookie recipes. It works best when combined with other flours. For a simple batch of chewy cookies, you can adapt your favorite recipe by substituting a portion of the all-purpose or gluten-free flour blend with arrowroot. For example, in a recipe calling for 2 cups of flour, try using 1 1/2 cups of a gluten-free all-purpose blend and 1/2 cup of arrowroot flour. This combination results in a cookie that is less dense and has a more tender interior. Filipino Uraro, or arrowroot cookies, are famous for their melt-in-your-mouth quality, which comes from using a high proportion of arrowroot flour.
5. Simple and Elegant Arrowroot Pudding
Arrowroot's ability to create a smooth, thick texture makes it perfect for puddings and custards. This simple recipe highlights its power. In a saucepan, create a slurry by whisking 1/4 cup of arrowroot powder with a little cold milk until smooth. Then, stir in the rest of 2 cups of milk (dairy or plant-based works well), 1/4 cup of sugar, and a pinch of salt. Place the saucepan over medium heat and stir constantly until the mixture thickens and just begins to bubble, which should take about 5-7 minutes. Remove from the heat and stir in a teaspoon of vanilla extract. Pour into serving dishes and let it chill in the refrigerator for at least two hours to set. This creates a delightfully smooth, traditional pudding that can be served plain or with fresh fruit.