
Recognising the Signs
Before you get your hands dirty, it’s crucial to know if your plant actually needs a new pot. The most obvious sign is roots poking out of the drainage holes at the bottom. Another clue is that the soil dries out extremely quickly after watering, meaning
there's more root than soil in the pot. You might also notice that water sits on top without being absorbed, or that the plant's growth has slowed down or stopped altogether, even during its growing season. If your plant looks top-heavy and is prone to tipping over, it's a clear signal it has outgrown its home.
Timing Is Everything
The best time to repot is during the plant's active growing season, which for most houseplants is spring or summer. Repotting during this period of natural growth helps the roots establish themselves more quickly in the new soil. Some experts also point to early fall as a good window, as plants are beginning to slow their growth for winter, which can make the transition less of a shock. Avoid repotting in the middle of extreme heat or deep winter if you can, as this can add unnecessary stress. However, if a plant is struggling due to root rot or other urgent issues, don't wait for the perfect season—repotting becomes a rescue mission.
Prep for a Smooth Move
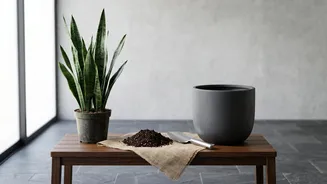
Preparation is key to a stress-free repotting day. First, choose a new pot that is only 1-2 inches larger in diameter than the current one. Moving into a pot that's too big can lead to the soil staying wet for too long, which risks root rot. Ensure the new pot has drainage holes. The day before you plan to repot, give your plant a good watering. This helps the root ball slide out of the old pot more easily and ensures the plant is hydrated, reducing the risk of shock.
The Gentle Removal
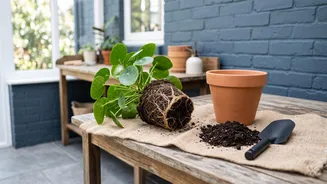
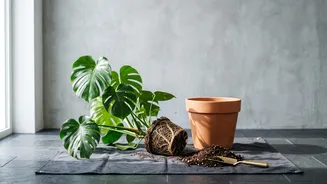
When it's time to move, be gentle. Tip the plant on its side and gently squeeze or tap the pot to loosen the soil and roots. Try to slide the plant out rather than pulling it by its stems or leaves, which can cause damage. Once it's out, inspect the root ball. If the roots are tightly wound in a circle (a condition known as being 'root-bound'), gently tease them apart with your fingers. This encourages them to grow outwards into the new soil instead of continuing to circle. Don't worry about being perfect; just aim to loosen the most compacted areas.
Settling into the New Home
Place a layer of fresh, appropriate potting mix in the bottom of the new container. Position your plant in the centre, ensuring the top of the root ball sits about an inch below the rim of the pot to leave room for watering. Fill in the space around the root ball with more fresh soil, gently patting it down to eliminate large air pockets. Avoid packing the soil too tightly, as this can suffocate the roots. Once potted, for most tropical houseplants, a thorough watering is essential. This helps the new soil settle around the roots and provides immediate hydration. However, for succulents and cacti, it's best to wait a week or more before watering to allow any damaged roots to callous over and prevent rot.
Post-Potting Care
After repotting, your plant is in recovery mode. This is called 'transplant shock', and it's normal to see some mild wilting or yellowing leaves for a week or two. To help it recover, place the plant in a spot with indirect light, even if it's a sun-loving variety. Direct sun can be too intense for stressed roots. Hold off on fertilizing for at least four to six weeks. Fresh potting mix contains plenty of nutrients, and adding more can 'burn' the delicate, recovering roots. The best sign of a successful recovery is the appearance of new growth.