






Choosing Your Indian Flour
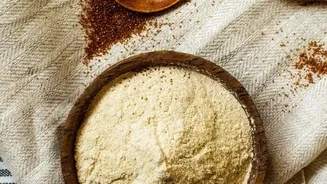
The foundation of your starter is the flour. While Western recipes specify bread flour, Indian kitchens are rich with options that work beautifully. Whole wheat atta, the cornerstone of our daily rotis, is excellent for kicking off a starter. Because
it includes the entire wheat kernel—bran, germ, and all—it's packed with the natural yeasts and microbes needed for fermentation. Maida, or all-purpose flour, can also be used, but it's more refined and has less microbial activity. For the best results, consider starting with whole wheat atta for the first few days to get things going, then switching to a mix of atta and maida, or just maida, if you prefer a lighter-tasting bread later on. The unique stone-grinding process of chakki atta can sometimes result in starch damage that makes it different from Western flours, but for a starter, this is not a significant hurdle.
Day 1-2: Creating the Culture
Let's begin. Find a clean glass jar (an old coffee or pickle jar works perfectly). You don't need anything fancy, but glass is essential so you can see the activity. Using a kitchen scale for accuracy is highly recommended. On Day 1, mix 50 grams of whole wheat atta with 50 grams of room-temperature, non-chlorinated water in your jar. Stir vigorously until no dry flour remains. The consistency should be a thick, lump-free paste. Cover the jar loosely with its lid or a piece of cloth and leave it in a warm spot in your kitchen for 24 hours. After 24 hours, you might see a few small bubbles, or you might see nothing at all. Both are normal. Now it's time for the first feeding. Discard all but about 50 grams of the starter. Add a fresh 50 grams of flour and 50 grams of water, mix well, and cover.
Day 3-5: Patience and Observation
This is where many first-time bakers get discouraged. During these days, you might notice a burst of activity followed by a sudden lull. It may develop a slightly sour or even unpleasant smell. This is a normal phase where different bacteria are competing before the desirable yeast and lactobacilli take over. The key is consistency. Continue your daily routine: discard all but 50 grams of your starter and feed it with a fresh 50 grams of flour and 50 grams of water. In India's warmer climate, you may notice fermentation happens much faster. If your starter seems to rise and fall quickly within 12 hours, or if it develops a strong, alcoholic smell (called hooch), it's a sign that it's hungry. If this happens, you should switch to feeding it twice a day, roughly 12 hours apart.
Day 6-10: Becoming Active and Strong
By now, your starter should be showing reliable signs of life. You'll begin to notice a predictable pattern: after feeding, it will start to rise, reaching a peak height in the jar within 4 to 8 hours, and then begin to fall. A healthy starter will be full of bubbles of various sizes and have a pleasant, mildly sour, or fruity aroma. One of the best ways to test if your starter is ready for baking is the 'float test'. Drop a small spoonful of your active, peaked starter into a glass of water. If it floats, it's full of trapped gas and is ready to leaven bread. If it sinks, it likely needs a few more days of consistent feedings to build strength.
Maintaining Your Indian Starter
Congratulations, you've cultivated wild yeast! Now you have a living leavening agent. If you plan to bake frequently (a few times a week), you can keep your starter on the kitchen counter, feeding it once or twice daily. If you bake less often, the refrigerator is your friend. Before refrigerating, give it a fresh feeding, let it sit for about an hour, and then place it in the fridge. A refrigerated starter needs to be fed at least once a week to stay healthy. To revive it for baking, take it out of the fridge, feed it, and let it become active and bubbly at room temperature. You may need one or two feeding cycles to get it back to full strength before using it in a recipe.