






Start with the Right Prep
Before you begin weaving, preparing your hair is a crucial first step that sets the foundation for a smooth, long-lasting braid. It’s often easier to braid hair that isn’t freshly washed; second-day hair tends to have more grip and texture, which helps
hold the style in place. If your hair is too clean and silky, it can be slippery and difficult to manage. To mimic this texture, you can apply a texturizing spray or a light-hold mousse to give your strands some grit. Next, thoroughly brush your hair to remove any knots or tangles. Starting with a smooth base prevents snags during the braiding process, making it a much more pleasant experience and ensuring the final result looks polished and neat.
Step 1: Divide Your Hair
Once your hair is prepped, gather it all to one side for a side-swept look, or simply let it hang down your back. For absolute beginners, it can be helpful to secure your hair into a low ponytail with a disposable elastic first. This keeps the base secure as you learn the motions. Once you're comfortable, you can skip this step. Now, divide your hair into two large, equal sections. Unlike a traditional three-strand braid, the fishtail only requires two main sections. Hold one section in your left hand and the other in your right. Keeping these two main sections separate and distinct is the key to a successful fishtail braid.
Step 2: The Weaving Motion
This is where the magic happens. Start with either the left or the right section. Take a small, thin strand of hair—about a quarter to a half-inch thick—from the outermost edge of the right section. Cross this small strand over the top of the main right section and add it to the inside of the left section. Now, repeat the exact same motion on the other side. Take a small strand from the outer edge of the left section, cross it over the top of the main left section, and merge it into the inside of the right section. The core of the fishtail braid is this simple pattern: a small piece from the outside of one section is passed over to join the inside of the opposite section. That’s it.
Step 3: Continue and Secure
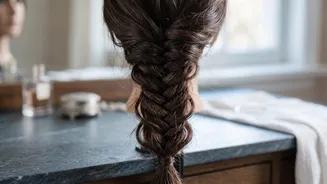
Continue this criss-cross pattern all the way down the length of your hair. As you work, try to keep the strands you're crossing over roughly the same size for a uniform, neat braid. Thinner strands will create a more intricate, detailed fishtail, while thicker strands result in a chunkier, more bohemian look. Don't worry if it's not perfect; part of the fishtail's charm is its slightly undone quality. Once you reach the end, leaving about an inch or two of hair loose, secure the braid with a hair tie. If you started with an elastic at the top, you can now carefully cut and remove it.
Finishing Touches for a Fuller Look
For a fuller, more voluminous and romantic look, gently pull the braid apart. This technique is often called 'pancaking'. Starting from the top and working your way down, use your thumb and forefinger to gently tug on the outer loops of the braid. This will loosen the weave and create the illusion of thicker, more plentiful hair. Be careful not to pull too hard, or you might unravel your work entirely. A light mist of hairspray can help set the style and tame any flyaways, especially if you have layered hair. You can also gently pull out a few face-framing pieces to soften the look further.