


The Magic of No-Churn Ice Cream
The secret to a fantastic homemade ice cream that doesn't turn into a block of ice is the no-churn method. Traditionally, ice cream machines churn a custard base, constantly moving it to prevent large ice crystals from forming while incorporating air.
This results in a smooth, scoopable texture. The no-churn technique cleverly mimics this process using just a few key ingredients. The magic lies in the combination of whipped heavy cream and sweetened condensed milk. The whipped cream introduces air, creating a light, fluffy body, while the high sugar content in condensed milk lowers the freezing point of the mixture, which helps prevent it from freezing solid and keeps it creamy. It’s a simple, genius hack for achieving that luscious, premium texture right in your own kitchen.
Gathering Your Simple Ingredients
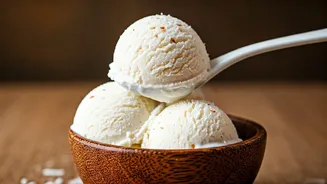
One of the best things about this recipe is its simplicity. You only need a handful of fresh ingredients to create this tropical delight. For the most authentic flavour, reminiscent of the famous Natural's ice cream, using fresh, high-quality ingredients is key. Here’s what you’ll need: Tender Coconut Flesh (Malai): About 1 cup, plus a little extra, finely chopped for texture. This is the star of the show, providing the signature sweet, nutty flavour. Heavy Whipping Cream: 1 cup, chilled. The fat content is crucial for a rich, creamy result, so opt for full-fat cream. Sweetened Condensed Milk: About ½ cup. This provides both sweetness and the creamy structure. Tender Coconut Water: About ½ cup. Using the water from the same coconuts enhances the natural flavour. * A Pinch of Salt: This small addition helps to balance the sweetness and elevate the overall flavour.
Your Step-by-Step Guide to Creaminess
Making this ice cream is a straightforward process that takes very little active time. Here's how to do it: 1. Prepare the Coconut Base: In a blender, combine 1 cup of the tender coconut flesh (malai) with the tender coconut water. Blend until you have a smooth, silky paste. Set this aside. 2. Whip the Cream: In a separate large bowl, preferably one that has been chilled, whip the cold heavy cream using an electric beater or a hand whisk. Continue until stiff peaks form. This means when you lift the beaters, the cream holds its shape. Be careful not to over-whip, or you’ll start making butter. 3. Combine the Ingredients: Gently pour the sweetened condensed milk into the whipped cream. Add the tender coconut paste and the pinch of salt. Using a spatula, fold everything together until it’s just combined. You want to keep as much air in the whipped cream as possible. 4. Add Texture: Gently fold in the extra finely chopped pieces of tender coconut flesh. This step is optional but adds a lovely bite and texture to the final ice cream. 5. Freeze: Pour the mixture into a freezer-safe, airtight container, like a loaf pan. Press a piece of parchment paper or plastic wrap directly onto the surface to prevent ice crystals from forming. Freeze for at least 6-8 hours, or overnight, until firm.
Tips for Perfect Results
To ensure your ice cream is perfectly creamy and delicious, keep these tips in mind. First, make sure your cream, bowl, and even the whisk attachments are well-chilled before you start. Cold ingredients whip up better and create a lighter texture. When it comes to the tender coconut, fresh is always best for flavour. For the creamiest result, blend the coconut flesh and water into a very smooth paste to avoid a grainy feel. Finally, patience is key. Letting the ice cream freeze overnight will give it the best possible scoopable texture. When you're ready to serve, let the container sit at room temperature for about 5-10 minutes to soften slightly, making it easier to scoop.