



Safety First: Your Essential Gear
Before you begin, prioritising safety is non-negotiable. You will be working with sharp edges, heat, and potentially fine glass dust. Always wear cut-resistant gloves to protect your hands and safety goggles to shield your eyes from any flying shards.
It is also wise to work in a well-ventilated area, especially when sanding, to avoid inhaling glass particles. Keep a clean workspace and handle all glass pieces with care, as even a small shard can cause injury.
Gather Your Tools and Bottles
Having the right equipment makes the process smoother and safer. For cutting, the most reliable tool is a dedicated glass bottle cutter kit, which often includes support wheels for stability and a durable diamond carbide blade. You will also need access to both boiling hot water and a sink or bucket of ice-cold water. For the finishing touches, have medium and fine-grit sandpaper on hand. To drill a hole for wiring, a Dremel or standard drill equipped with a diamond-tipped drill bit is essential, as regular bits will shatter the glass. As for the bottles, almost any round bottle will work, but start with a standard wine or beer bottle before attempting more unique shapes.
The Scoring Method: A Precise Cut
The most consistent method for cutting a bottle involves scoring and thermal shock. First, adjust your bottle cutter to the desired height and place the bottle on its rollers. Firmly apply pressure and rotate the bottle once to create a single, even score line around its circumference. Do not go over the line a second time, as this can cause an uneven break. Next, carefully pour boiling water over the score line for about 20 seconds, rotating the bottle to heat it evenly. Immediately plunge the bottle into the ice water. The sudden change in temperature will cause the glass to crack cleanly along the scored line. If it doesn’t separate on the first try, repeat the hot and cold water process.
Drilling the Perfect Hole for Wiring
To turn your bottle into a lamp, you'll need a hole near the base for the electrical cord. This requires a diamond drill bit, specifically designed to grind through glass without cracking it. It is crucial to keep the glass and the drill bit cool with water during this process to prevent overheating and breakage. You can place the bottle in a sink under a small, steady trickle of water. Start drilling at a slow speed with light pressure to create an initial groove. Let the tool do the work, and avoid pushing too hard. This step requires patience; it may take several minutes to grind all the way through, but the slow and steady approach ensures a clean hole.
Smoothing the Edges for a Safe Finish
After cutting, the new glass edge will be extremely sharp and must be smoothed down. The best way to do this is by wet-sanding. Submerging the glass edge and sandpaper in water minimizes hazardous glass dust and helps create a smoother finish. Start with a medium-grit sandpaper (around 150-grit) and sand the edge in a circular motion to remove any large burrs or sharp points. Once the edge is uniform, switch to a fine-grit sandpaper (400-grit or higher) to polish it until it is completely smooth to the touch. A rotary tool with a sanding attachment can also be used for a quicker, more polished result.
Bringing Your Light to Life
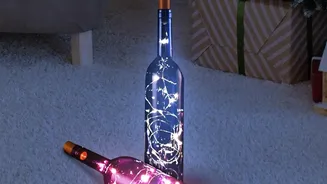
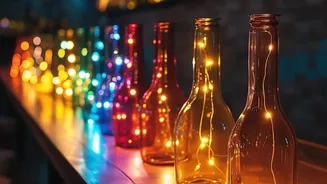
With the bottle cut and drilled, the final step is adding the light. For pendant lights, you can thread a pendant light kit through the drilled hole and up through the neck of the bottle. If you've created a standing lamp base, a bottle lamp kit provides all the necessary wiring, socket, and switch components. For an even simpler and more whimsical option that requires no drilling, simply fill the cut bottle with battery-operated fairy or micro LED string lights. This creates a magical glow perfect for decorative accents on shelves or tables.